Introduction
Cherry crisp is a delightful dessert that brings together the bright, tart flavors of fresh cherries with the comforting warmth of a crisp topping. This dish transforms simple ingredients into a luscious treat, perfect for any occasion, from a family dinner to a summer gathering.
Making cherry crisp at home is not only rewarding but also allows you to customize it to your taste, adjusting the sweetness or seasoning to match your preferences. With its unbeatable aroma wafting through your kitchen, this dessert will have everyone anticipating the first bite.
Whether you are a seasoned baker or a novice home cook, cherry crisp offers an approachable recipe that welcomes experimentation. You can easily adapt it depending on the season or what you have on hand.
Ingredients
- 4 cups fresh cherries, pitted
Fresh cherries are the star of this dessert, providing a sweet yet tart flavor that balances perfectly with the crisp topping. Choose ripe cherries for the best sweetness and the most vibrant color. - 1 cup granulated sugar
Sugar sweetens the cherries, enhancing their natural flavors. Depending on the sweetness of your cherries, you can adjust the sugar to achieve your desired level of sweetness. - 1 tablespoon lemon juice
Lemon juice adds acidity, which brightens the flavor of the cherries. It helps to balance the sweetness and intensifies the overall taste of the filling. - 1 teaspoon vanilla extract
Vanilla extract adds depth and complexity, complementing the cherries' fruity notes. It's a wonderful aromatic addition that enhances the dessert's cozy character. - 1 cup rolled oats
Rolled oats form the base of the crisp topping, adding both texture and nutty flavor. They absorb some juice from the cherries, contributing to a satisfying crunch. - 1/2 cup all-purpose flour
Flour helps to bind the crisp topping together, creating a crumbly texture that contrasts beautifully with the soft cherries. It also adds a touch of structure to the topping. - 1/2 cup brown sugar
Brown sugar brings a deeper sweetness and a hint of molasses flavor. It enriches the topping and enhances the overall flavor profile of the crisp. - 1/2 teaspoon ground cinnamon
Cinnamon infuses warmth and a subtle spiciness into the topping, enhancing the flavor of both the cherries and the oat mixture. It’s a classic pairing with fruity desserts. - 1/4 cup unsalted butter, melted
Butter provides richness and moisture to the crisp topping. It helps to create a golden, crispy texture when baked, making it irresistible.
Directions & Preparation
Step 1: Preheat the oven to 350°F (175°C).
Preheating the oven ensures that the cherry crisp cooks evenly and thoroughly, leading to a perfectly baked dish. An adequately heated oven promotes optimal browning of the topping, which is crucial for achieving that desirable crisp texture.
Step 2: Prepare the cherries by washing, pitting, and slicing them.
Preparing the cherries is essential for the filling of the crisp. By pitting and slicing, you allow the juices to flow and mingle with the sugar and lemon juice, creating a flavorful, syrupy mixture. This step highlights the cherries' beautiful color and provides a more enjoyable texture.
Step 3: In a large mixing bowl, combine the cherries, granulated sugar, lemon juice, and vanilla extract. Toss well to coat the cherries.
Combining the cherries with sugar and lemon ensures that each piece is coated, which promotes even flavor throughout the filling. The sugar will draw out the natural juices of the cherries, creating a luscious sauce that complements the crisp topping.
Step 4: Transfer the cherry mixture to a greased 9×13-inch baking dish and spread it evenly.
Spreading the cherry mixture evenly in the baking dish guarantees that every bite is flavorful and ensures that the crisp topping sits evenly over the fruit. A properly greased dish prevents the cherries from sticking and makes for easier serving.
Step 5: In another bowl, mix the rolled oats, flour, brown sugar, cinnamon, and salt together.
Mixing the dry topping ingredients in a separate bowl allows for even distribution of flavors. The oats, flour, sugar, and spices will create a cohesive mixture, ensuring an evenly textured and flavored topping that crisps up perfectly during baking.
Step 6: Pour the melted butter over the dry topping mixture and stir until crumbly.
The melted butter binds the topping ingredients together while adding richness. It's important to keep the mixture crumbly rather than fully combining it, as this texture is what creates a nice contrast with the soft cherries during baking.
Step 7: Sprinkle the topping evenly over the cherry mixture in the baking dish.
Covering the cherry filling with the crumbly topping in an even layer ensures that the cherries are protected and that the mixture receives direct heat from the oven. This promotes a delightful browning and crisping of the topping, which is vital for that perfect cherry crisp.
Step 8: Bake in the preheated oven for about 45–50 minutes, or until the topping is golden brown and the cherries are bubbly.
Monitoring the baking time is crucial for achieving the right consistency and texture. The bubbling cherries signal that they have released their juices, while the golden crust indicates that the topping is perfectly crisp. Ovens can vary, so keep an eye on the dish as it bakes.
Step 9: Let the cherry crisp cool for at least 15 minutes before serving.
Allowing the cherry crisp to cool helps the juices thicken slightly, making it easier to serve without running everywhere. This resting period also helps the flavors meld together, enhancing the overall experience of the dessert.
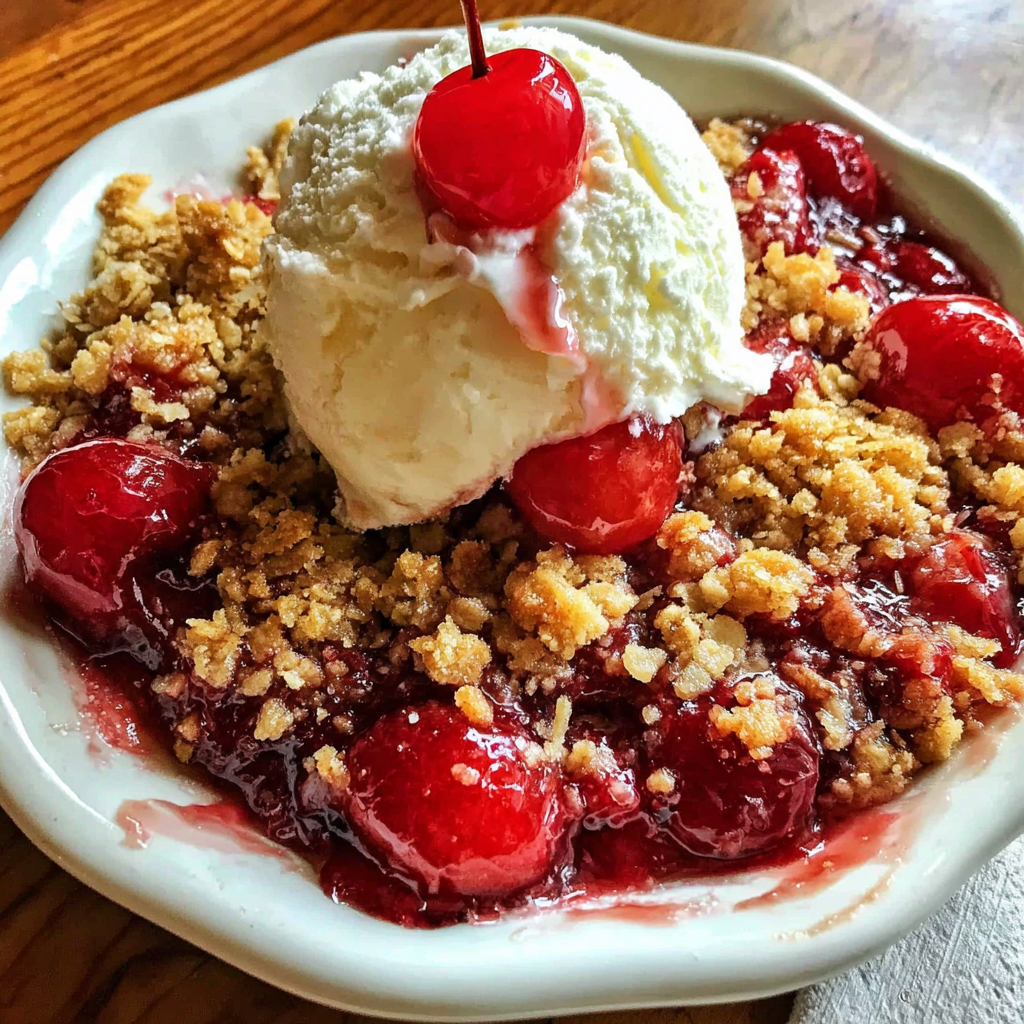
Step 10: Serve warm, preferably with a scoop of vanilla ice cream or whipped cream.
Serving cherry crisp warm with a creamy accompaniment takes the dessert to another level. The contrast of hot cherry filling with cool ice cream creates a delightful experience, making each bite a perfect balance of temperatures and textures.

Unlocking Flavor with Fresh Ingredients
Using fresh, in-season cherries is key to elevating your cherry crisp to another level. Local or organic cherries often have more flavor and juiciness compared to store-bought options. Their vibrant taste can transform a simple dessert into a showstopper, making each bite a burst of summer goodness.
Customizing Your Topping with Creativity
While oats and flour are the bases of a traditional topping, feel free to get creative! Adding nuts like pecans or walnuts can introduce a different flavor profile and crunch. You could also experiment with spices like nutmeg or cardamom to give it a unique twist that complements the cherries beautifully.
Perfect Pairings: Enhancing the Experience
Cherry crisp is versatile and can be enjoyed in various ways. Consider pairing it with tangy Greek yogurt for a healthier option or indulging in a scoop of rich, creamy vanilla ice cream for a classic dessert experience. A drizzle of warm caramel sauce can also enhance the sweet-tart flavor of the cherries.
FAQs
What can I do if my cherry filling turns out too thin?
If your cherry filling is too thin, you can thicken it by mixing a tablespoon of cornstarch with a little water to create a slurry. Stir this into the cherry mixture before baking to help it set better.
How can I adjust the recipe for a smaller baking dish?
To adjust for a smaller baking dish, you can halve all ingredients. Just be sure to monitor the baking time, as a smaller quantity may cook faster.
What if the topping ends up too crumbly and doesn’t hold together?
If your topping is too crumbly, make sure there’s enough butter in the mixture. You can also sprinkle a little more water or milk to help bind it together, ensuring it forms clumps.
Can I replace the oats with a gluten-free alternative?
Yes, you can substitute the rolled oats with gluten-free oats to make this recipe gluten-free without losing the desired texture.
Is it possible to use frozen cherries for this recipe?
Absolutely! Frozen cherries can work well, but be sure to thaw them first and drain any excess liquid to avoid a soggy filling.
What if the cherry crisp tastes bland after baking?
If the cherry crisp tastes bland, it might need more seasoning. Add a pinch of salt to enhance the flavors, or consider incorporating additional lemon juice to brighten the taste.
Conclusion
Cherry crisp is not only a simple dessert; it’s a celebration of flavor and texture. Each element plays a vital role in crafting this beloved treat, making it a delightful experience for both the cook and those who enjoy it.
By choosing high-quality ingredients and taking your time with each step, you’ll ensure that your cherry crisp becomes a cherished addition to your dessert repertoire. Whether it's a family favorite or a new creation, your cherry crisp is sure to impress.
Recipe Card
Savor the Sweetness of Homemade Cherry Crisp
Ingredients
Method
- Preheat the oven to 350°F (175°C).
- Prepare the cherries by washing, pitting, and slicing them.
- In a large mixing bowl, combine the cherries, granulated sugar, lemon juice, and vanilla extract. Toss well to coat the cherries.
- Transfer the cherry mixture to a greased 9x13-inch baking dish and spread it evenly.
- In another bowl, mix the rolled oats, flour, brown sugar, cinnamon, and salt together.
- Pour the melted butter over the dry topping mixture and stir until crumbly.
- Sprinkle the topping evenly over the cherry mixture in the baking dish.
- Bake in the preheated oven for about 45–50 minutes, or until the topping is golden brown and the cherries are bubbly.
- Let the cherry crisp cool for at least 15 minutes before serving.
- Serve warm, preferably with a scoop of vanilla ice cream or whipped cream.
Notes
Additional serving suggestions: pair with a crisp salad, garlic bread, or roasted seasonal vegetables for balance.
For make-ahead, prep components separately and assemble just before heating to preserve texture.
Taste and adjust with acid (lemon/vinegar) and salt right at the end to wake up flavors.