Introduction
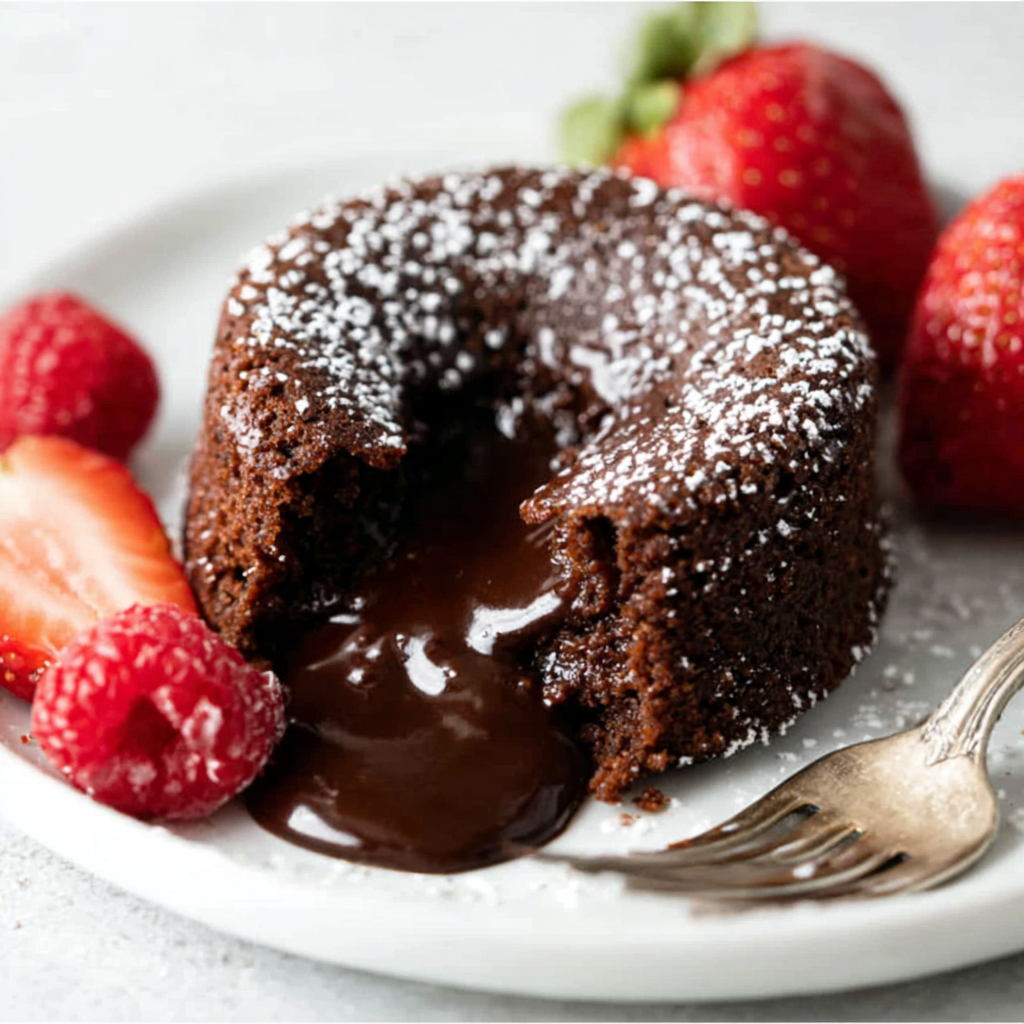
Chocolate molten lava cakes are a dream for any chocolate lover, combining a rich, decadent exterior with a flowing, warm chocolate center. These petite desserts are not only visually stunning but also incredibly satisfying, making them a perfect treat for special occasions or a cozy night in.
What makes these cakes particularly appealing is their dual texture: a slightly crisp outer shell gives way to a molten, gooey center that oozes out with each forkful. With minimal ingredients and straightforward techniques, you can impress family and friends in mere moments with this indulgent dessert.
Ingredients
- 1/2 cup (115 g) unsweetened dark chocolate
A key player, dark chocolate provides a rich, intense flavor that balances the sweetness of the cake. Its low sugar content enhances the overall chocolate experience. - 1/2 cup (115 g) unsalted butter
Butter not only contributes to the moistness of the cake but also enriches its taste. The fat in the butter helps create a silky texture that enhances the molten center. - 1 cup (120 g) powdered sugar
Powdered sugar sweetens the batter while maintaining a smooth texture. It dissolves easily, eliminating any graininess and ensuring a velvety finish. - 2 large eggs
Eggs act as a binding agent, providing structure while also adding moisture. They are crucial for achieving the delightful gooey center. - 2 large egg yolks
Extra yolks boost the richness of the batter, enhancing the overall creamy consistency and flavor of the molten center. - 1 teaspoon vanilla extract
Vanilla adds warmth and depth to the flavor profile. It enhances the chocolate without overwhelming it, providing a balanced taste. - 1/4 cup (30 g) all-purpose flour
Flour gives structure to the cakes while allowing the interior to remain soft and liquid. It's the minimal addition that helps hold the luscious center. - Butter and cocoa powder (for greasing molds)
Using butter and cocoa powder to grease the ramekins ensures a seamless release, preventing the cakes from sticking and helping to maintain their lava center.
Directions & Preparation
Step 1: Preheat your oven to 425°F (220°C).
Preheating is vital for achieving the right texture and ensuring even baking. An adequately heated oven helps create the right crust while allowing the center to remain molten, which is the hallmark of these delightful cakes.
Step 2: Grease four ramekins with butter and dust lightly with cocoa powder.
This step is crucial for ensuring your molten lava cakes release smoothly from their molds. The cocoa powder also adds an extra layer of chocolate flavor, enhancing the overall taste experience.
Step 3: In a microwave-safe bowl, melt butter and dark chocolate together until smooth, stirring until combined.
Melting chocolate and butter together creates a uniform mixture that serves as the foundation for your batter. Stir it well to ensure a fully incorporated blend, preventing any clumps or separation.
Step 4: Whisk in powdered sugar until smooth.
Integrating powdered sugar carefully ensures that it is fully dissolved, contributing to a silky batter. This step is essential to prevent any graininess in the final cake, ensuring a delightful texture.
Step 5: Add the eggs and egg yolks, whisking until combined, followed by the vanilla extract.
Incorporating eggs at this stage is important for building structure while maintaining moisture. The eggs provide richness and help with the rise as the cakes bake.
Step 6: Sift in the flour and gently fold until just combined.
Folding in the flour rather than whisking helps prevent overmixing, which can lead to denser cakes. The goal is to just incorporate the flour, maintaining a light batter.
Step 7: Pour the batter into the prepared ramekins, filling them about 2/3 of the way full.
Properly filling your ramekins allows enough space for the cakes to rise and develop their molten centers. Be mindful not to overfill, as that can cause overflow during baking.
Step 8: Bake for 12-14 minutes, or until the edges are firm but the center is still soft.
This step is where the magic happens. Baking for too long will result in a fully set center, while underbaking gives you that lush, flowing lava effect. Keep a close eye, as oven times may vary.
Step 9: Let the cakes cool for 1 minute before inverting onto plates.
Allowing the cakes to rest briefly helps them hold their shape during inversion. This crucial step allows the molten center to remain contained when the ramekin is removed.
Step 10: Serve immediately with optional accompaniments.
Serving these cakes promptly is key to enjoying the molten center. You can garnish with ice cream, fresh berries, or a simple dusting of powdered sugar to elevate the experience.

Chocolate Quality Matters
The richness of your molten lava cake largely depends on the quality of chocolate you use. Opt for high-quality dark chocolate with a cocoa content of at least 60% to bring depth and complexity to the flavor. Cheaper chocolates often contain fillers and lack the robust taste that good chocolate provides.
Eggs for Texture and Richness
The role of eggs is crucial in this recipe, as they contribute to both the texture and the richness of the cake. Using large eggs ensures the right amount of moisture and structure, while the extra yolks amplify the creaminess of the molten center. The balance of whole eggs and yolks is what makes a successful lava cake.
Serving and Pairing Suggestions
Serve your molten lava cakes warm to experience the delightful contrast of textures. Pairing them with a scoop of vanilla ice cream or a dollop of whipped cream enhances the sweetness and adds a refreshing element. Fresh berries or a sprinkle of sea salt can also complement the richness, creating an indulgent dessert that pleases the palate.
FAQs
What should I do if the center is too thick?
If the center is too thick, it may be that the cakes were overbaked. To correct this in the future, reduce the baking time by a minute or two and keep a closer eye on the cakes towards the end.
Why did my cakes overflow during baking?
Overfilling the ramekins is often the culprit for overflowing. Make sure to fill them only about 2/3 full to allow room for the cakes to rise.
Can I use chocolate chips instead of dark chocolate?
Yes, chocolate chips can be used, but they may contain stabilizers that can slightly alter the texture of the molten center. Opt for high-quality chips to achieve a better outcome.
What if I don’t have ramekins? Can I use a different baking dish?
You can use any oven-safe dish that allows for individual servings, just adjust the baking time accordingly, as larger or smaller dishes can affect the cooking time.
How do I know when my cakes are ready?
The edges should be set, while the center should remain soft and slightly jiggly when you gently shake them. It's a balance to achieve that perfect lava.
Can I add other flavors or ingredients to the batter?
Absolutely! You can incorporate espresso powder, orange zest, or peppermint extract to the batter for added flavor. Just be mindful not to overpower the chocolate.
Conclusion
Chocolate molten lava cakes are not only a dessert but a delicious experience that can transport you to a world of indulgence. With their enticing aroma and warm, chocolatey center, these cakes are sure to impress anyone who takes a bite.
Whether you're celebrating a special occasion or just treating yourself after a long day, these little cakes promise a moment of pure bliss. Happy baking!
Recipe Card
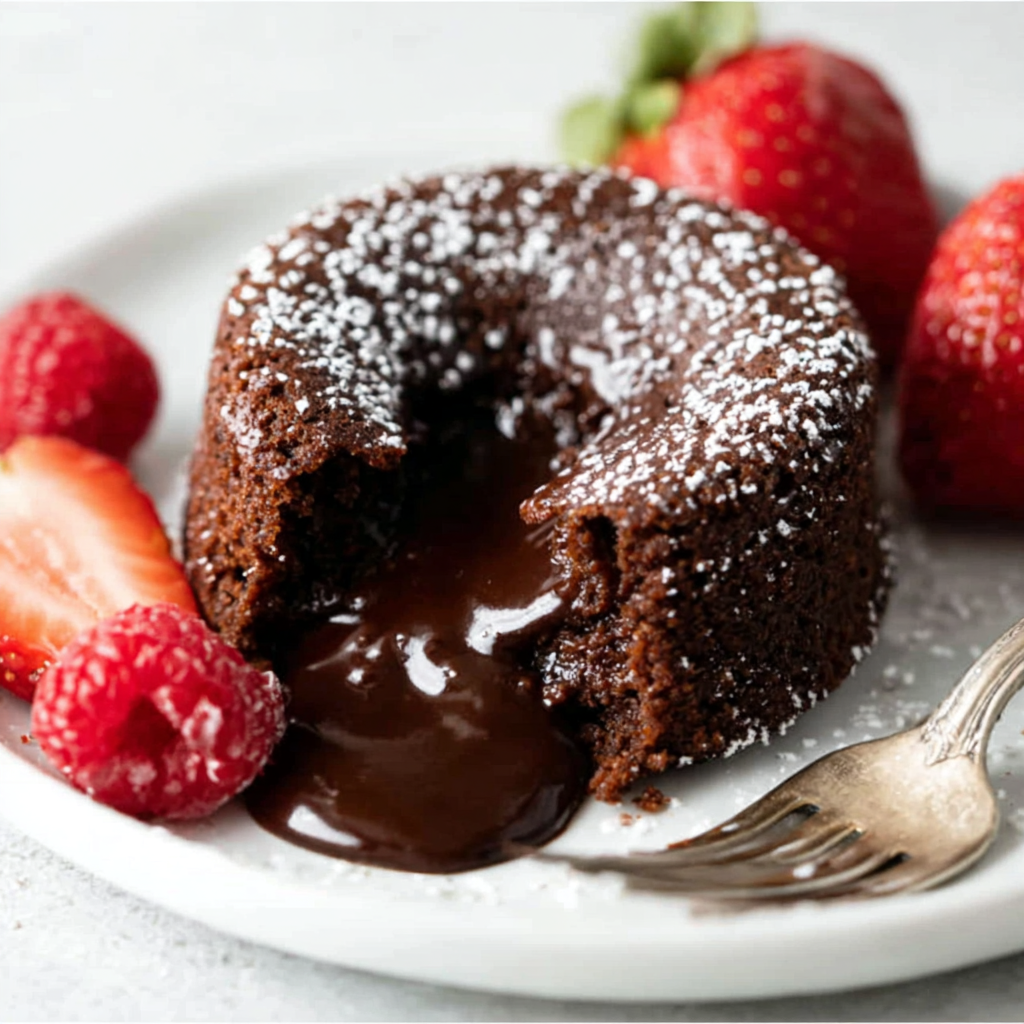
Decadent Chocolate Molten Lava Cakes for Home Bakers
Ingredients
Method
- Preheat your oven to 425°F (220°C).
- Grease four ramekins with butter and dust lightly with cocoa powder.
- In a microwave-safe bowl, melt butter and dark chocolate together until smooth, stirring until combined.
- Whisk in powdered sugar until smooth.
- Add the eggs and egg yolks, whisking until combined, followed by the vanilla extract.
- Sift in the flour and gently fold until just combined.
- Pour the batter into the prepared ramekins, filling them about 2/3 of the way full.
- Bake for 12-14 minutes, or until the edges are firm but the center is still soft.
- Let the cakes cool for 1 minute before inverting onto plates.
- Serve immediately with optional accompaniments.
Notes
Additional serving suggestions: pair with a crisp salad, garlic bread, or roasted seasonal vegetables for balance.
For make-ahead, prep components separately and assemble just before heating to preserve texture.
Taste and adjust with acid (lemon/vinegar) and salt right at the end to wake up flavors.