Introduction
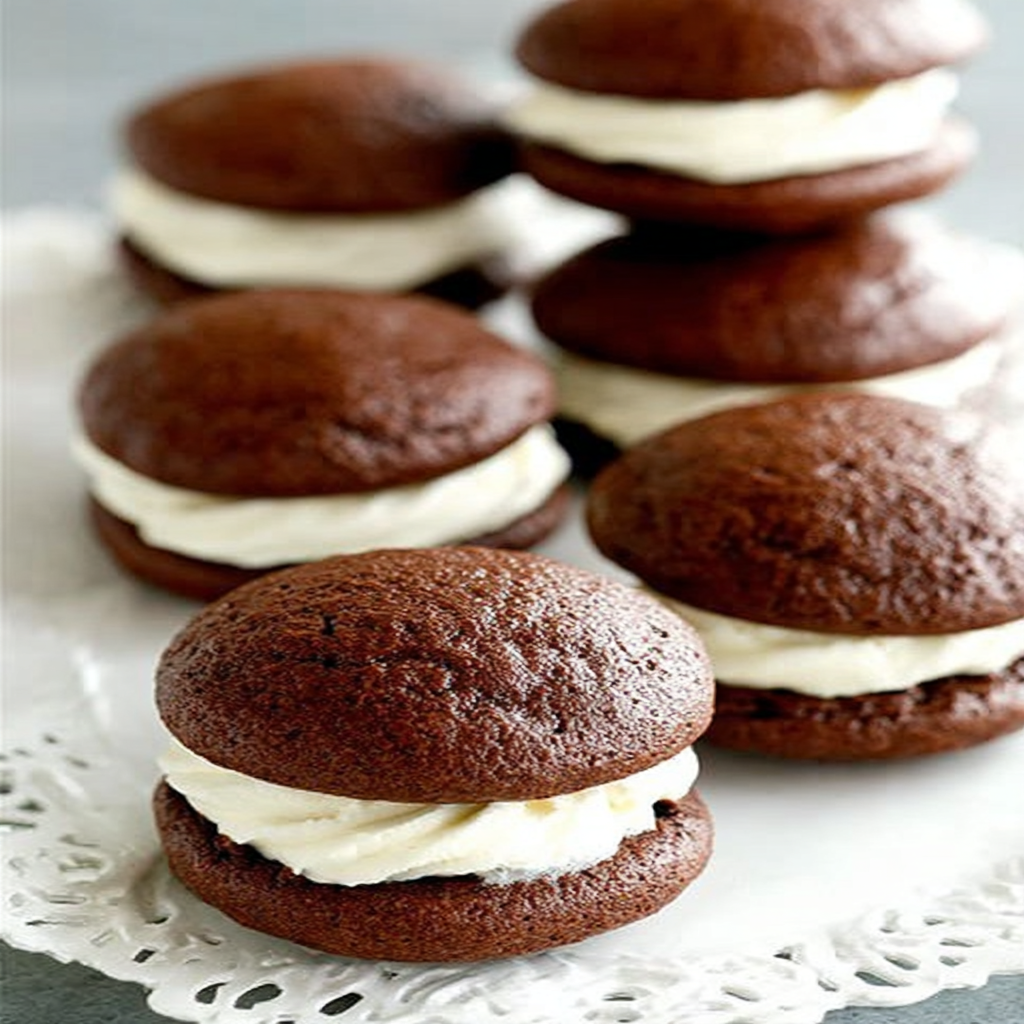
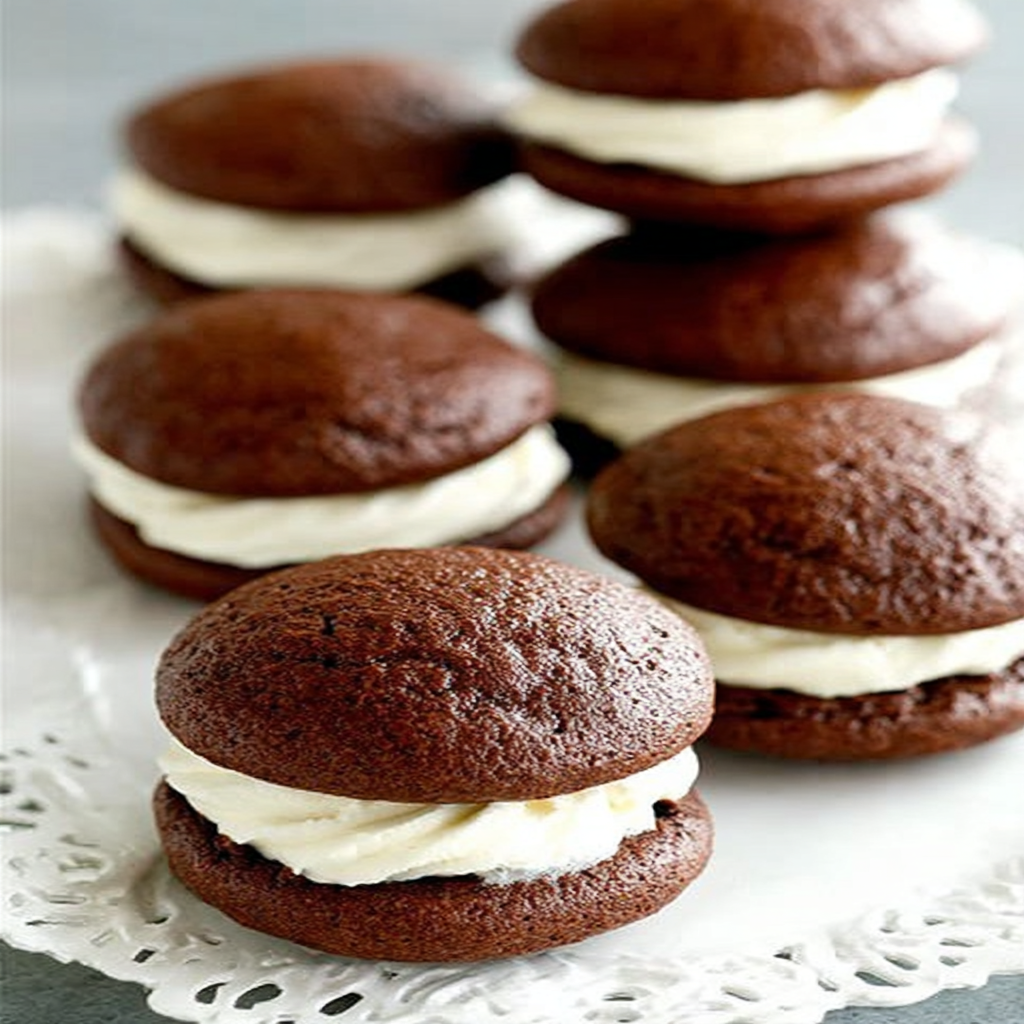
Chocolate whoopie pies are a delightful combination of soft chocolate cake and creamy filling, creating a sandwich that will satisfy any sweet tooth. These treats are not only visually appealing but also bursting with flavor, making them perfect for celebrations or simply as a comforting dessert at home.
The origins of whoopie pies are debated, with claims tracing back to New England and even the Pennsylvania Amish community. Regardless of their roots, these treats have found a beloved place in many households around the country. Their unique texture and rich chocolatey nature make them a timeless dessert.
Creating chocolate whoopie pies at home is simpler than it sounds, and the reward of sharing them with family and friends is worth every bit of effort. Let’s dive into the ingredients and the process that will bring these delightful sandwiches to life.
Ingredients
- 2 cups all-purpose flour
All-purpose flour acts as the foundation for the whoopie pies, providing structure and balance. It absorbs moisture and helps maintain the soft, cake-like texture. - 1 cup unsweetened cocoa powder
Cocoa powder brings the rich chocolate flavor that defines whoopie pies. It also contributes to the dark color and adds depth to the overall taste. - 1 teaspoon baking soda
Baking soda acts as a leavening agent, helping the cakes rise during baking. This creates a light texture that contrasts well with the creamy filling. - 1/2 teaspoon baking powder
While baking soda is crucial, baking powder adds an extra lift, ensuring that every whoopie pie has a soft, fluffy body. - 1/2 teaspoon salt
Salt enhances the flavors of the chocolate and balances the sweetness of the filling. It ensures every bite tastes rich and rounded. - 1/2 cup unsalted butter, at room temperature
Butter adds moisture and richness, contributing to a tender crumb. Its creamy texture melds beautifully with the other wet ingredients. - 1 cup granulated sugar
Sugar sweetens the whoopie pies and helps with browning during baking. It also aids in creating a desirable texture by incorporating air when creamed with butter. - 1 large egg
Eggs are essential for binding the ingredients together and provide moisture and richness. They also help in achieving the cake-like consistency. - 1 teaspoon pure vanilla extract
Vanilla enhances the overall flavor profile, adding aromatic notes that complement the chocolate beautifully. - 1 cup milk
Milk adds moisture to the batter, ensuring the whoopie pies are soft. It also helps dissolve the dry ingredients, resulting in a smoother batter. - 1 cup powdered sugar
Powdered sugar, used in the filling, provides sweetness and a smooth texture. It helps create a fluffy consistency that's easy to spread. - 1/2 cup cream cheese, softened
Cream cheese adds richness and tanginess to the filling, providing a balance against the sweetness of the sugar and chocolate. - 1 teaspoon vanilla extract (for filling)
Similar to the cake components, vanilla in the filling enhances the flavor, marrying well with the cream cheese.
Directions & Preparation
Step 1: Preheat your oven to 350°F (175°C).
Preheating the oven ensures that the whoopie pies bake evenly from the start. If the oven isn't hot enough, the cakes may spread instead of rising, resulting in a flat texture.
Step 2: In a large bowl, sift together the flour, cocoa powder, baking soda, baking powder, and salt.
Sifting the dry ingredients not only mixes them well but also aerates the flour, which contributes to a lighter cake. This step removes any lumps that could affect the texture.
Step 3: In a separate bowl, cream together the butter and granulated sugar until light and fluffy.
Creaming these two ingredients introduces air into the mixture, essential for a fluffy texture. It also melts the sugar slightly, resulting in a smoother batter.
Step 4: Add in the egg and vanilla extract, mixing until just combined.
Incorporating eggs helps bind the ingredients together while the vanilla enhances flavor. Be careful not to overmix; mixing until just combined maintains a tender cake.
Step 5: Gradually add the dry mixture to the wet mixture, alternating with the milk, and mix until smooth.
This step is important to avoid overworking the batter. Alternating helps maintain a smooth consistency without developing too much gluten, ensuring a tender result.
Step 6: Use a cookie scoop or spoon to drop batter onto a lined baking sheet, spacing them about 2 inches apart.
Uniform size is key for even baking. Spacing allows for the cookies to expand without merging together, forming distinct pies.
Step 7: Bake in the preheated oven for 10 to 12 minutes, until the edges are firm but the centers are soft.
Baking for the right time is critical; underbaking will leave the centers gooey, while overbaking may dry them out. Look for a set edge with a slightly soft center.
Step 8: Remove from the oven and let them cool on the baking sheet for a few minutes before transferring to a wire rack.
Cooling slightly on the baking sheet allows the cookies to firm up, making them easier to move without breaking. Once on the wire rack, they cool completely.
Step 9: While cooling, prepare the filling by beating the cream cheese, powdered sugar, and vanilla until smooth and fluffy.
Beating the filling until fluffy creates a light texture that spreads easily. The cream cheese's tang balances the sweetness of the powdered sugar.
Step 10: Pair up the cooled chocolate cakes by size and spread a generous amount of filling on the flat side of one pie, then top with its pair.
Creating pairs ensures uniformity in your whoopie pies. Generously spreading the filling ensures the pies are rich and satisfying with each bite.
Step 11: Enjoy immediately or store them in an airtight container.
Storing the whoopie pies in an airtight container protects them from drying out, allowing the flavors to meld together for an even more delicious experience.

Choosing the Right Cocoa Powder
The type of cocoa powder you choose significantly impacts the flavor of your whoopie pies. Unsweetened cocoa is ideal as it provides a rich chocolate base without added sugars that could alter the dessert's balance. Depending on your preference, consider Dutch-process cocoa for a milder taste or natural cocoa for a stronger chocolate flavor, as these choices change the acidity and eventual taste of the final product.
Creative Fillings Beyond Cream Cheese
While the classic cream cheese filling is a beloved choice, experimenting with different fillings can elevate these whoopie pies. Consider using a marshmallow fluff, a ganache made from heavy cream and chocolate, or even flavored buttercreams, like espresso or peppermint. Each variation introduces new textures and tastes, allowing you to customize your treats for different occasions or preferences.
Decorating Your Whoopie Pies
Presentation can change the entire experience of your whoopie pies. Drizzle melted chocolate over the assembled pies or dust them with powdered sugar for a touch of elegance. Consider placing additional fillings between the cakes or sprinkling crushed nuts for textural contrast. Personalizing how you serve these treats can transform them into a dessert worthy of any celebration.
FAQs
My whoopie pies are too thick, what went wrong?
If your whoopie pies are too thick, it may be due to overmixing the batter or not measuring the flour correctly. Ensure you spoon flour into the measuring cup without packing it down.
Can I substitute the cream cheese filling for something else?
Absolutely! You can try a buttercream, whipped cream, or even a fruity filling. Just ensure it complements the chocolate well.
What if my cookies are flat after baking?
Flat whoopie pies can result from too much butter or sugar, or from not chilling the dough before baking. Check your measurements and consider chilling the batter before scooping.
How can I make my whoopie pies more chocolatey?
To enhance the chocolate flavor, you can use a higher percentage cocoa powder or add chocolate chips into the batter before baking.
What’s the best way to keep them fresh longer?
Store whoopie pies in an airtight container at room temperature, and they will stay fresh for several days. For even longer freshness, refrigerate them.
Can I turn these whoopie pies into a cake?
While whoopie pies are typically smaller, you can certainly layer the batter into a cake pan. Just adjust the baking time and keep an eye on it for doneness.
Conclusion
Chocolate whoopie pies are a delightful treat that can bring joy to any gathering or simply brighten up your day when you're craving something sweet. With a little practice, you can perfect your technique and customize them to suit your tastes.
Whether you keep it classic or explore unique fillings and decorations, these whoopie pies are sure to impress your family and friends. Grab your ingredients and get started on this delicious journey!
Recipe Card
Decadent Chocolate Whoopie Pies for Every Occasion
Ingredients
Method
- Preheat your oven to 350°F (175°C).
- In a large bowl, sift together the flour, cocoa powder, baking soda, baking powder, and salt.
- In a separate bowl, cream together the butter and granulated sugar until light and fluffy.
- Add in the egg and vanilla extract, mixing until just combined.
- Gradually add the dry mixture to the wet mixture, alternating with the milk, and mix until smooth.
- Use a cookie scoop or spoon to drop batter onto a lined baking sheet, spacing them about 2 inches apart.
- Bake in the preheated oven for 10 to 12 minutes, until the edges are firm but the centers are soft.
- Remove from the oven and let them cool on the baking sheet for a few minutes before transferring to a wire rack.
- While cooling, prepare the filling by beating the cream cheese, powdered sugar, and vanilla until smooth and fluffy.
- Pair up the cooled chocolate cakes by size and spread a generous amount of filling on the flat side of one pie, then top with its pair.
- Enjoy immediately or store them in an airtight container.
Notes
Additional serving suggestions: pair with a crisp salad, garlic bread, or roasted seasonal vegetables for balance.
For make-ahead, prep components separately and assemble just before heating to preserve texture.
Taste and adjust with acid (lemon/vinegar) and salt right at the end to wake up flavors.