Introduction
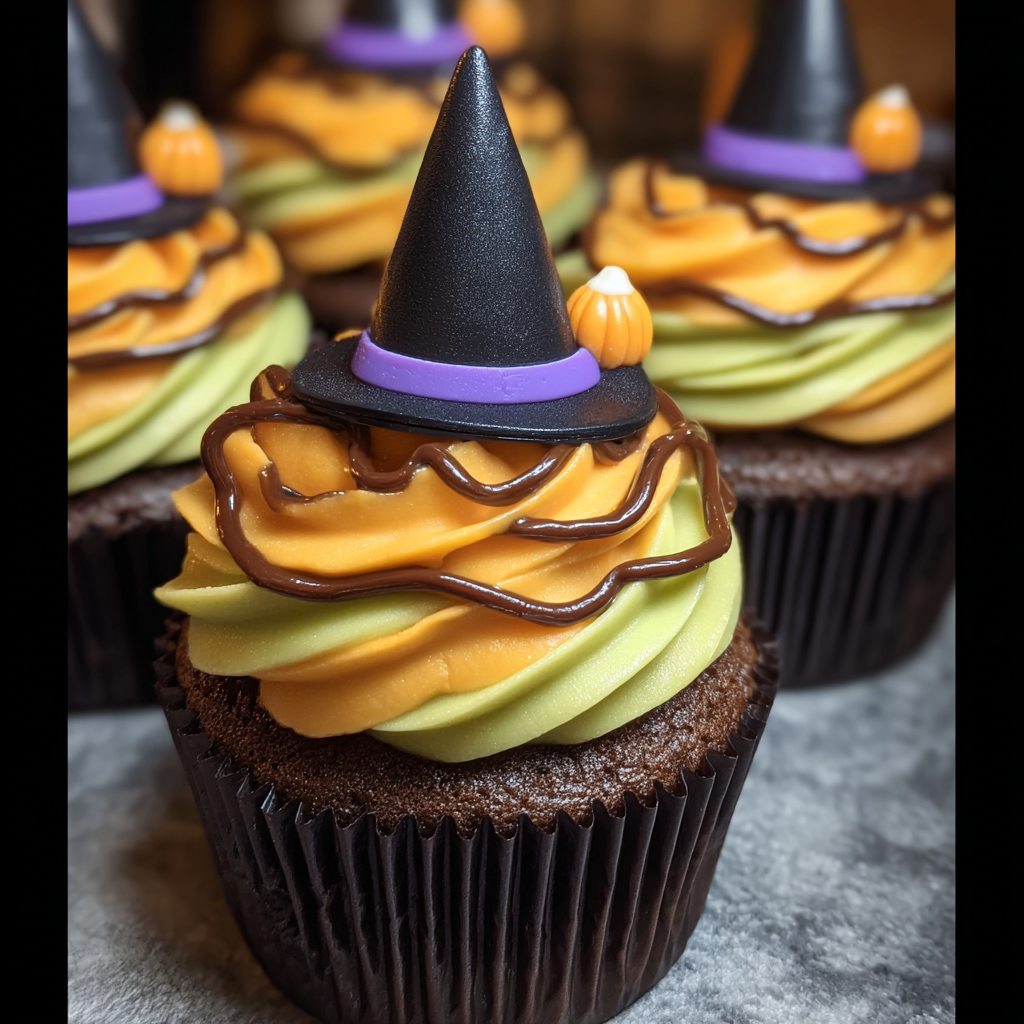
Witch hat cupcakes are a whimsical treat that will steal the spotlight at any Halloween gathering. These charming cupcakes not only satisfy your sweet tooth but also add a touch of magic to your festivities. The combination of rich chocolate flavor and playful decoration makes them a favorite among both kids and adults.
Creating these enchanting desserts involves a bit of creativity in both baking and decorating. With a soft chocolate base topped with a clever witch hat made from cones, they offer a fun project for bakers of all skill levels. Whether you're hosting a spooky soirée or looking to impress at a potluck, these cupcakes are sure to enchant every guest.
Ingredients
- 1 ½ cups all-purpose flour
This forms the structure of the cupcakes, providing the necessary gluten to give them a soft, tender crumb. All-purpose flour is versatile and suitable for achieving the right balance between lightness and density in baked goods. - 1 cup granulated sugar
Sugar not only sweetens the cupcakes but also contributes to their moisture and tenderness. It aids in the browning process during baking, giving the cupcakes a lovely color and enhancing their flavor. - ½ cup unsweetened cocoa powder
Cocoa powder is essential for delivering rich chocolate flavor. It also helps to create a darker color and adds a slight bitterness that balances the sweetness of the sugar in the cupcakes. - 1 teaspoon baking powder
This leavening agent is crucial for helping the cupcakes rise. It reacts with the moisture and heat during baking to create carbon dioxide, leading to fluffy, airy cupcakes. - ½ teaspoon baking soda
Baking soda helps balance the acidity of the cocoa powder and works alongside baking powder to ensure a good rise in the cupcakes. It also contributes to the overall texture. - ½ teaspoon salt
Salt enhances the flavors in the cupcakes, making the chocolate taste richer and more pronounced. It also helps to balance the sweetness of the sugar. - 2 large eggs
Eggs act as binders, holding the ingredients together. They also add moisture and richness, contributing to the structure and flavor of the cupcakes. - ½ cup vegetable oil
Oil helps to create a moist, tender crumb in the cupcakes. Unlike butter, oil remains liquid at room temperature, which aids in the overall texture and moistness of the finished product. - ½ cup buttermilk
Buttermilk adds acidity, which helps to activate the baking soda and gives the cupcakes a light and fluffy texture. It also contributes a subtle tang that balances out the sweetness. - 1 teaspoon vanilla extract
Vanilla extract enhances the overall flavor profile of the cupcakes, adding a warm, comforting note. It complements the chocolate and makes the taste more complex. - 1 package chocolate wafer cookies (for decoration)
These cookies will form the base of the witch hats. Their chocolate flavor and crispy texture create a nice contrast to the soft cupcakes while adding an element of fun. - 1 package candy corn (for decoration)
Candy corn serves as the perfect finishing touch on top of each witch hat, adding visual appeal and a burst of sweetness. They create that quintessential witch hat look that delights both kids and adults. - Buttercream frosting (for frosting and holding hats)
Buttercream frosting is essential for both the moisture and sweetness it provides to the cupcakes. It also acts as an adhesive to secure the cookie hats, making for a stable and beautiful presentation.
Directions & Preparation
Step 1: Preheat the oven to 350°F (175°C).
Preheating your oven is crucial as it ensures an even baking temperature right from the start. This allows the cupcakes to rise properly and develop the desired texture. Waiting for the oven to reach the ideal temperature guarantees that your baked goods don't start cooking unevenly.
Step 2: Line a muffin tin with cupcake liners.
Lining the muffin tin with cupcake liners not only helps with easy removal after baking but also adds a fun element to your presentation. Choose colorful or Halloween-themed liners to enhance the festive look of your witch hat cupcakes.
Step 3: In a large bowl, mix together the dry ingredients: flour, sugar, cocoa powder, baking powder, baking soda, and salt.
Combining the dry ingredients first ensures that they are evenly distributed, which is vital for achieving consistent flavor and texture across all cupcakes. Whisking these ingredients together helps to break up any clumps and incorporates air for a lighter crumb.
Step 4: In another bowl, whisk the eggs, then add the oil, buttermilk, and vanilla extract, mixing until combined.
Whisking the eggs before adding other wet ingredients allows for aeration, which aids in fluffiness. Using buttermilk in this mixture adds moisture and subtly acidic notes that enhance flavor and texture in the cupcakes.
Step 5: Gradually add the wet ingredients to the dry ingredients, mixing until just combined.
Mixing until just combined helps prevent overworking the batter, which can lead to dense and tough cupcakes. The goal is to blend the ingredients enough to eliminate dry spots while still keeping the batter slightly lumpy for a perfect rise in the oven.
Step 6: Spoon the batter into the prepared cupcake liners, filling them about two-thirds full.
Filling the liners to the right level is key. Overfilling can cause the cupcakes to overflow, while underfilling can lead to flat tops. Two-thirds full is generally ideal, allowing space for rising without creating a mess.
Step 7: Bake for 18-20 minutes, or until a toothpick inserted into the center comes out clean.
Baking time may vary based on your oven and the size of your cupcakes. Using a toothpick is a classic method for testing doneness; if it comes out clean, the cupcakes are ready. This step is essential to avoid overbaking, which can dry out your treats.
Step 8: Let cupcakes cool in the pan for 5 minutes, then transfer to a wire rack to cool completely.
Allowing the cupcakes to cool in the pan initially helps them to set a bit, making them easier to handle. Transferring them to a wire rack provides air circulation, which cools the cupcakes evenly, preventing sogginess from trapped steam.
Step 9: Frost each cupcake generously with buttercream frosting using a piping bag.
Frosting the cupcakes while they're completely cooled prevents the frosting from melting and sliding off. Using a piping bag allows for a neat, decorative finish that can enhance the visual appeal, making your witch hats even more impressive.
Step 10: Place a chocolate wafer cookie on top of each frosted cupcake to create the base of the witch hat.
This step is essential for assembling your witch hats. The cookie provides the structure and visual effect that make these cupcakes special. Placing them on top of the frosting allows it to act as glue, ensuring they stay in place.
Step 11: Finally, add a candy corn piece to the top of each cookie to complete the witch hat look.
The candy corn adds the finishing touch, transforming a simple cookie into a whimsical witch hat. This step not only enhances the appearance but also adds an extra layer of flavor, tying everything together beautifully for your Halloween celebration.

Creating the Perfect Chocolate Cupcake Base
The key to a moist and flavorful witch hat cupcake starts with the right chocolate base. Balancing the ingredients correctly, particularly the flour and cocoa powder, is crucial. Utilizing buttermilk not only enhances flavor but also helps the cupcakes achieve that irresistibly plush texture, making each bite a heavenly experience.
Decorating Your Cupcakes with a Halloween Twist
Decorating is where the real magic happens with these witch hat cupcakes. Using chocolate wafer cookies as the hat adds a delightful crunch, while the vibrant yellow-orange candy corn accentuates the Halloween theme. Let your creativity shine by personalizing decorations to suit your party's ambiance or to reflect your favorite spooky motifs.
Troubleshooting Common Baking Issues
Baking can sometimes lead to unexpected outcomes, but many issues can be resolved with simple adjustments. If cupcakes turn out too dry, consider reducing baking time or adding a touch more oil. For a denser texture, ensure you’re not overmixing the batter. Learning from these experiences makes each baking session a valuable opportunity for growth.
FAQs
Why are my cupcakes too dense?
Dense cupcakes often result from overmixing the batter or using too much flour. Make sure to gently fold the wet ingredients into the dry until just combined to maintain a light texture.
Can I use a different frosting type?
Absolutely! Feel free to experiment with cream cheese or whipped cream frosting. Just ensure whatever you choose can hold up the wafer cookie hats.
What if my frosting is too stiff?
If your buttercream is too stiff, try adding a few drops of milk or cream to loosen it up. This will help you achieve a smoother piped finish.
Can I use store-bought cupcakes?
Yes, if you're short on time, store-bought cupcakes can make this process easier. Just be sure to use your homemade frosting and decorations for that personal touch.
How can I color my frosting?
You can use gel food coloring to tint your frosting to fit the Halloween theme. Just add a small amount at a time until you achieve the desired shade.
What other decorations can I use?
Consider using gummy worms, edible glitter, or chocolate sprinkles for added effects to enhance the spooky theme. The possibilities are endless!
Conclusion
Witch hat cupcakes are more than just a delicious dessert; they're an interactive and creative project that brings joy to bakers and eaters alike. This unique treat not only tastes incredible but also serves as a centerpiece that showcases your festive spirit.
With simple ingredients and a bit of imagination, you can transform ordinary cupcakes into magical delights. Embrace your creativity and make these enchanting desserts a highlight of your Halloween festivities.
Recipe Card

Delightful Witch Hat Cupcakes for Halloween Parties
Ingredients
Method
- Preheat the oven to 350°F (175°C).
- Line a muffin tin with cupcake liners.
- In a large bowl, mix together the dry ingredients: flour, sugar, cocoa powder, baking powder, baking soda, and salt.
- In another bowl, whisk the eggs, then add the oil, buttermilk, and vanilla extract, mixing until combined.
- Gradually add the wet ingredients to the dry ingredients, mixing until just combined.
- Spoon the batter into the prepared cupcake liners, filling them about two-thirds full.
- Bake for 18-20 minutes, or until a toothpick inserted into the center comes out clean.
- Let cupcakes cool in the pan for 5 minutes, then transfer to a wire rack to cool completely.
- Frost each cupcake generously with buttercream frosting using a piping bag.
- Place a chocolate wafer cookie on top of each frosted cupcake to create the base of the witch hat.
- Finally, add a candy corn piece to the top of each cookie to complete the witch hat look.
Notes
Additional serving suggestions: pair with a crisp salad, garlic bread, or roasted seasonal vegetables for balance.
For make-ahead, prep components separately and assemble just before heating to preserve texture.
Taste and adjust with acid (lemon/vinegar) and salt right at the end to wake up flavors.