Introduction
Halloween is right around the corner, and with it comes the joy of creating deliciously creepy treats. One spectacular option is Oreo Eyeball Truffles, which blend the beloved flavors of Oreo cookies with a playful, spooky presentation.
These truffles are perfect for parties, gatherings, or simply to enjoy at home with family. Easy to make and fun to decorate, they are equally appealing to both kids and adults, offering a delightful way to celebrate the season.
Ingredients
- 1 package Oreo cookies (14.3 oz)
The base of this recipe, Oreo cookies bring a rich chocolate flavor and creamy filling that help achieve the delightful sweetness of the truffles. Their unique texture also provides the perfect crunch, giving a great contrast to the smooth truffle coating. - 4 oz cream cheese, softened
Cream cheese acts as a binding agent, providing moisture and richness to the truffles. Its tangy flavor balances the sweetness, creating a harmonious blend that enhances the overall taste, making each bite pleasantly indulgent. - 8 oz white chocolate or candy melts
White chocolate or candy melts form the outer shell of the truffles, adding a sweet, creamy coating that perfectly encases the Oreo mixture. The melting chocolate also serves as a base for attaching the decorations, enhancing the visual appeal. - Black candy melts (for decoration)
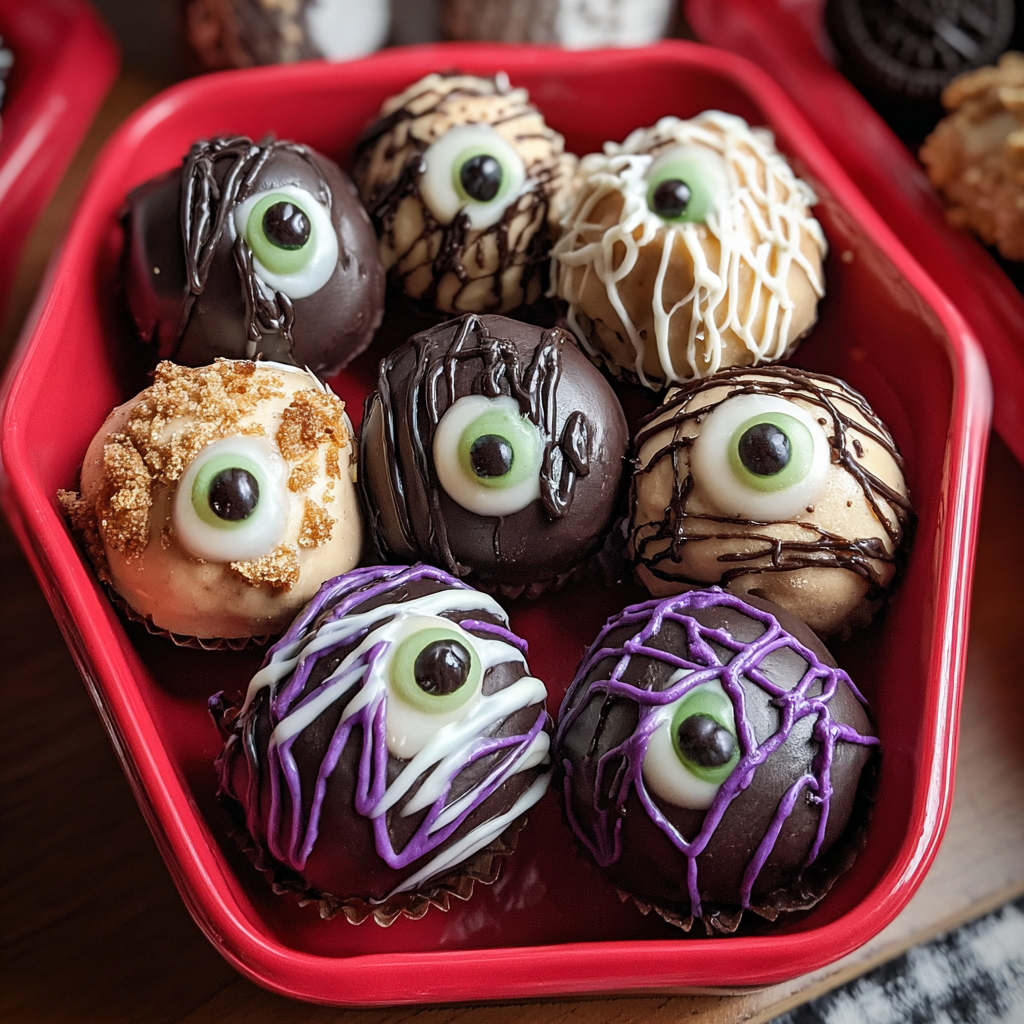
These colored melts are used to create the pupils for the eyeballs, contrasting beautifully with the white chocolate exterior. The use of black candy melts helps elevate the spooky theme while providing a fun visual detail to each truffle. - Candy eyeballs (for decoration)
Candy eyeballs add a playful touch, capturing the essence of Halloween. They are easy to find during the season and serve as the perfect focal point for your truffles, making them both festive and fun.
Directions & Preparation
Step 1: Crush the Oreo cookies
Begin by placing the Oreo cookies in a food processor and pulse until they are finely crushed. This step is crucial as it forms the foundation of the truffle mixture. The finer the crumbs, the smoother the truffle will be. If you don’t have a food processor, you can also place them in a zip-top bag and crush them with a rolling pin.
Step 2: Mix in the cream cheese
In a mixing bowl, combine the crushed Oreos with the softened cream cheese until well incorporated. Using your hands may be necessary for thorough mixing. This step helps create a cohesive filling that is both flavorful and easy to shape into truffles. Ensure the cream cheese is softened to room temperature for optimal blending.
Step 3: Form truffle balls
Using your hands, scoop out small portions of the Oreo mixture and roll them into 1-inch balls. This is a critical step in giving your truffles their shape. If the mixture is too sticky, refrigerate it for a few minutes to firm up, making it easier to form the balls.
Step 4: Chill the truffles
Place the formed truffle balls on a parchment-lined baking sheet and refrigerate for about 30 minutes. Chilling helps the truffles firm up, making them easier to coat with chocolate and ensuring they hold their shape. Don't skip this step; a well-chilled truffle is easier to work with.
Step 5: Melt the white chocolate or candy melts
Use a microwave or a double boiler to melt the white chocolate or candy melts, stirring until smooth. Melting chocolate is a delicate process; heat it in short bursts and stir frequently to prevent burning. This chocolate will create the sweet outer layer, so make sure it’s smooth and fully melted.
Step 6: Coat the truffles
Dip each chilled truffle into the melted white chocolate, using a fork to coat evenly. This step creates the delicious outer shell that keeps the truffle moist and adds that magical touch. Allow excess chocolate to drip off before returning each to the baking sheet.
Step 7: Decorate with black candy melts
While the white chocolate coating is still wet, place a candy eyeball on top of each truffle and drizzle with melted black candy melts to create the pupils. This step is where the truffles come to life! Work quickly, as the chocolate hardens fast, locking in the decorations before they can slide off.
Step 8: Let them set
Place the baking sheet with the decorated truffles back in the fridge for about 15 minutes, allowing the chocolate to set. This final cooling phase is essential for ensuring your truffles achieve a beautifully firm finish, maintaining their shape and making them easier to serve.

Versatile Variations on Decoration
Once you master the basic Oreo Eyeball Truffles, consider getting creative with decorations. You can coat the truffles in dark chocolate for a richer flavor or use different colored candy melts to match various seasonal themes. Toss in sprinkles or edible glitter for added flair, ensuring each batch is uniquely festive for any occasion.
Creative Flavor Twists
Eager for a flavor boost? Try mixing flavored cream cheese such as strawberry or vanilla into the Oreo base. For a textural difference, fold in mini chocolate chips or finely chopped nuts, adding even more character to your truffles. This experimentation can lead to delightful discoveries that suit your taste buds perfectly.
Sharing the Spooky Fun
These Oreo Eyeball Truffles make great gifts! Arrange them in a decorative box or on a festive platter to share with friends and family. They are a perfect treat for Halloween parties, school events, or workplace gatherings, spreading the holiday spirit and deliciousness all around while being a conversation starter!
FAQs
What should I do if my truffle mixture is too thick?
If the mixture feels too thick, consider adding a little extra softened cream cheese or a splash of vanilla extract to loosen it. Mix gradually until you reach a consistency that is easier to roll into balls.
Can I use milk chocolate instead of white chocolate?
Absolutely! You can use milk chocolate for the coating if you prefer a classic chocolate flavor. Just keep in mind that it may alter the overall taste profile of the truffles.
What if the coating gets too thick during melting?
If your chocolate coating becomes too thick, try adding a tiny bit of vegetable oil or shortening to thin it out. Stir well until smooth. This will make it easier to dip the truffles.
Can I use different types of Oreos?
Certainly! Experimenting with flavors like mint or peanut butter Oreos can add an exciting twist to your truffles. Just ensure that the filling complements the overall taste.
Are these truffles suitable for kids to help make?
Yes, these truffles are a fun project for kids! They can help crush the Oreos, mix the ingredients, and even decorate the finished truffles, making it a delightful family activity.
What other decorations can I use besides candy eyeballs?
Consider using M&M's, chocolate chips, or even piped frosting for varied decorations. Each option can create fun and distinct looks, making your truffles versatile and appealing.
Conclusion
Oreo Eyeball Truffles are not only delicious but also a perfect spooky treat that enlivens any Halloween gathering. With a handful of ingredients and a few simple steps, you can impress your guests with these adorable confections.
Embrace your creativity and have fun in the kitchen. Whether you stick to the classic versions or customize them with fun flavors and decorations, these truffles are sure to become a cherished tradition for many years to come.
Recipe Card

Create Spooky Oreo Eyeball Truffles At Home
Ingredients
Method
- Crush the Oreo cookies
- Mix in the cream cheese
- Form truffle balls
- Chill the truffles
- Melt the white chocolate or candy melts
- Coat the truffles
- Decorate with black candy melts
- Let them set
Notes
Additional serving suggestions: pair with a crisp salad, garlic bread, or roasted seasonal vegetables for balance.
For make-ahead, prep components separately and assemble just before heating to preserve texture.
Taste and adjust with acid (lemon/vinegar) and salt right at the end to wake up flavors.