Introduction
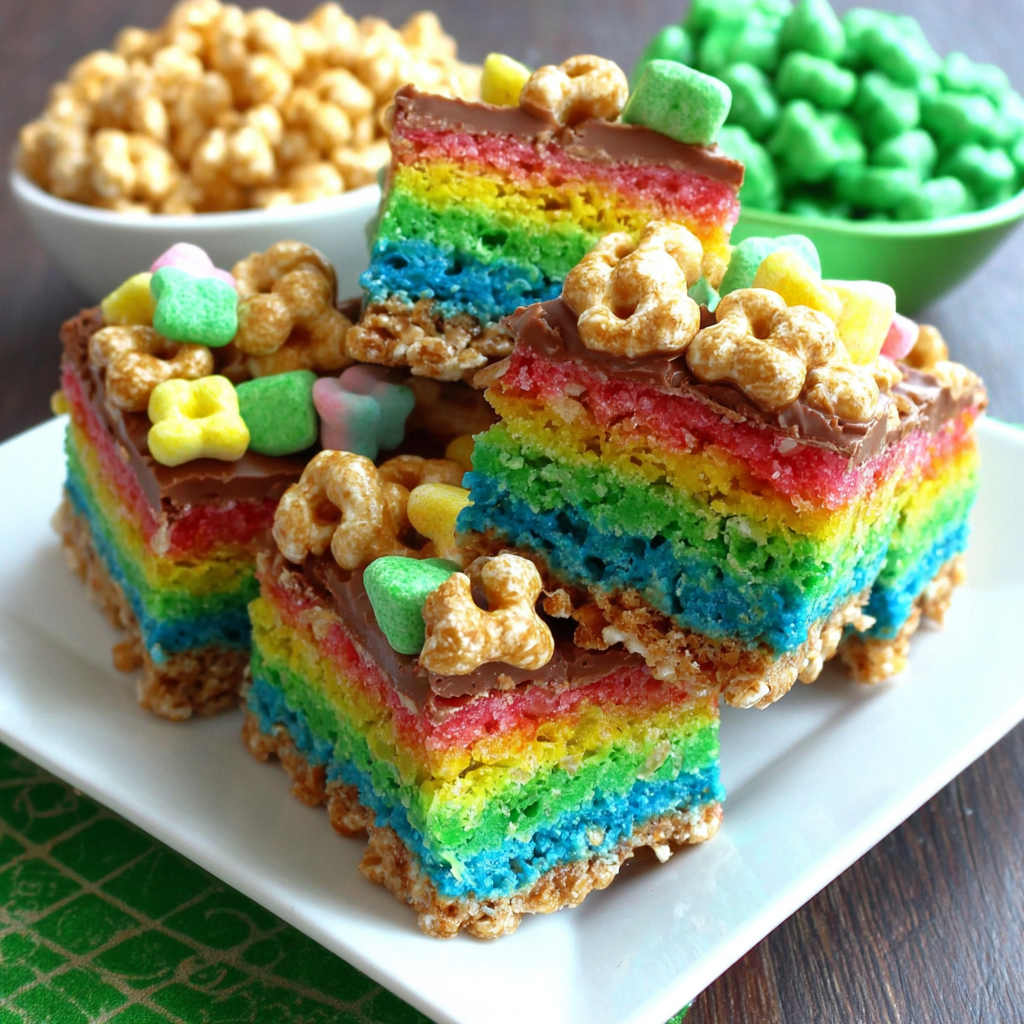
St. Patrick's Day is a time of celebration, filled with vibrant colors and cheerful spirit. It's the perfect occasion to whip up some delightful treats that not only look spectacular but also taste amazing. This year, impress your friends and family with colorful rainbow treats that capture the essence of the holiday.
These Rainbow St. Patrick's Day treats are a fun twist on traditional dessert options. Combining layers of cake, frosting, and colorful sprinkles, they are sure to bring smiles and joy to any gathering. A fantastic project to involve kids in the kitchen, this recipe is as enjoyable to make as it is to eat.
Ingredients
- 2 cups all-purpose flour
All-purpose flour serves as the main structure of the cake, providing the necessary gluten for stability. It creates a light and fluffy texture that holds up well under the layers of frosting. - 1 ½ cups granulated sugar
Granulated sugar not only sweetens the cake but also helps to create moisture. It caramelizes during baking, contributing to the cake's flavor and golden crust. - 1 cup unsalted butter, softened
Butter adds richness and depth of flavor to the cake. It creates a tender crumb and helps the cake rise as it traps air during the mixing process. - 4 large eggs
Eggs act as a binding agent, providing structure and stability to the cake. They also add moisture and richness, creating a creamy texture in the final product. - 1 cup whole milk
Milk adds moisture and helps to dissolve the sugar and combine the dry ingredients smoothly. It enriches the cake batter, ensuring a tender and flavorful dessert. - 2 tsp baking powder
Baking powder is a leavening agent that helps the cake rise during baking. It creates air pockets in the batter, resulting in a light and fluffy texture. - 1 tsp vanilla extract
Vanilla extract enhances the overall flavor of the cake, providing a warm, sweet aroma. It complements the sweetness of the sugar and the richness of the butter. - Food colorings (red, orange, yellow, green, blue, purple)
Food colorings are essential for creating the vibrant rainbow layers. Different colors will be blended into individual portions of the batter, resulting in a colorful visual appeal. - Buttercream frosting (for layering and decoration)
Buttercream frosting is creamy and sweet, perfect for binding the layers together. It adds an extra layer of flavor and also allows for creative decoration, enhancing the treat's festive appearance. - Rainbow sprinkles
Rainbow sprinkles add a fun, festive touch to the finished treats. They provide a crunchy texture and a burst of additional color, making the dessert visually appealing.
Directions & Preparation
Step 1: Preheat the oven to 350°F (175°C).
Preheating the oven ensures that your cake batter bakes evenly. An adequately heated oven allows for proper rising and a good texture. This step is crucial for achieving the right bake on your rainbow layers.
Step 2: Grease and flour six 9-inch round cake pans.
Greasing and flouring the cake pans prevents the layers from sticking once baked. This technique is essential for easily removing the cake layers, which ensures an attractive presentation.
Step 3: In a mixing bowl, cream butter and sugar together until light and fluffy.
Creaming butter and sugar properly is crucial as it incorporates air into the mixture, leading to a lighter cake texture. Aim for a pale, fluffy consistency to ensure maximum volume in your layers.
Step 4: Add eggs one at a time, mixing well after each addition.
Adding the eggs one at a time allows them to incorporate fully into the batter, providing structure and moisture. This step is important for achieving a smooth batter that will bake evenly.
Step 5: Combine flour and baking powder in another bowl, then gradually add to the butter mixture.
Mixing the dry ingredients separately allows for even distribution of the baking powder and flour. Gradually combining this mixture helps to avoid overmixing, preventing a tough cake texture.
Step 6: Stir in the milk and vanilla extract until well combined.
Incorporating the milk and vanilla adds moisture and flavor to the batter. Mixing just until combined ensures that the cake remains light and fluffy, enhancing the overall texture of the final product.
Step 7: Divide the batter evenly into six bowls, adding food coloring to each.
Dividing the batter lets you create distinct layers of color, setting the stage for a beautiful rainbow effect. Mix until the colors are vibrant and uniform, ensuring every slice of cake showcases the rainbow theme.
Step 8: Pour the colored batters into the prepared cake pans, layering them in a rainbow order.
Layering the batter in rainbow order creates a visually appealing cake that surprises when sliced. Take care to spread each layer evenly for uniform baking and presentation.
Step 9: Bake for 25-30 minutes or until a toothpick comes out clean.
Baking until a toothpick inserted into the center comes out clean ensures that the layers are fully cooked. Accurate timing prevents overbaking, which can lead to a dry cake.
Step 10: Allow the cakes to cool in the pans for 10 minutes, then transfer to wire racks to cool completely.
Cooling the cakes in the pans helps to set the structure before transferring them. Using wire racks allows air to circulate, cooling the layers evenly and preventing sogginess.
Step 11: Prepare the buttercream frosting and layer between the cake layers.
Layering buttercream between the cake layers not only provides flavor but also binds them together securely. This helps maintain the rainbow aesthetic while adding moistness to each slice.
Step 12: Frost the outside of the cake and decorate with rainbow sprinkles.
Frosting the outside of the cake creates a finishing touch that personalizes your treat. Sprinkles add an inviting crunch and vibrant color, making the cake eye-catching, especially for festive celebrations.

The Art of Layering Colors
Creating the colorful layers is an art in itself. Each layer of colored batter should be poured slowly into the cake pans to ensure they don't mix. Using a spatula to spread each layer helps maintain distinct lines, enabling that breathtaking rainbow effect when sliced into. Precision during this step is vital for achieving a visually striking dessert that will be the highlight of your St. Patrick's Day gathering.
Frosting and Decoration Tips
Frosting the cake is just as crucial as the baking process. Smooth, even layers of buttercream will enhance the appearance of the cake while offering the perfect balance of sweetness. Using a knife or an offset spatula can help achieve a sleek finish, and adding sprinkles at the end covers any frosting imperfections while creating a festive look. Get creative with decoration by mixing colors or using themed edible decorations!
Sharing the Rainbow Spirit
These rainbow treats are perfect for sharing, bringing happiness to friends, family, and even your community. Not only are they visually stunning, but they also invite conversations about the meaning of St. Patrick's Day. Encourage those you share with to partake in the joy of baking, perhaps even leading to their very own rainbow-themed creations!
FAQs
Why is my cake crumbly?
If your cake turns out crumbly, you may have overmixed the batter after adding the flour or not used enough moisture, like milk or eggs. Ensure that you mix until just combined and measure your ingredients accurately.
Can I use different colors for the rainbow layers?
Absolutely! Feel free to experiment with your favorite colors. As long as you stick with the vibrant theme, any color combination will work to create exciting rainbow layers.
What if my layers shrink or dome while baking?
If your cake layers dome or shrink, the oven temperature might be too high, causing rapid rising and then collapsing. Use an oven thermometer to ensure accuracy, and consider lowering the oven temperature slightly.
How do I prevent the cake from sticking to the pans?
Make sure to thoroughly grease and flour your pans before pouring in the batter. Alternatively, you can use parchment paper on the bottom to ensure easy release without sticking.
Is there a way to incorporate flavors into the cake?
Certainly! Adding extracts like almond or different citrus zests can enhance the flavor profile. Just ensure that they blend well with the vanilla base so that the colors remain the focus.
What can I do if my frosting is too soft?
If your frosting is too soft, try chilling it in the fridge for about 20-30 minutes, which will help firm it up. Additionally, adding more powdered sugar can increase the thickness and stability.
Conclusion
These delightful rainbow treats are sure to become a memorable part of your St. Patrick's Day festivities. With their eye-catching appearance and flavorful layers, they bring together the fun of baking and the joy of sharing.
As you gather with friends and family, let these colorful cakes symbolize the spirit of the holiday – togetherness, fun, and a touch of magic. Happy baking and enjoy every vibrant slice!
Recipe Card

Delightful Rainbow Treats for St. Patrick's Day
Ingredients
Method
- Preheat the oven to 350°F (175°C).
- Grease and flour six 9-inch round cake pans.
- In a mixing bowl, cream butter and sugar together until light and fluffy.
- Add eggs one at a time, mixing well after each addition.
- Combine flour and baking powder in another bowl, then gradually add to the butter mixture.
- Stir in the milk and vanilla extract until well combined.
- Divide the batter evenly into six bowls, adding food coloring to each.
- Pour the colored batters into the prepared cake pans, layering them in a rainbow order.
- Bake for 25-30 minutes or until a toothpick comes out clean.
- Allow the cakes to cool in the pans for 10 minutes, then transfer to wire racks to cool completely.
- Prepare the buttercream frosting and layer between the cake layers.
- Frost the outside of the cake and decorate with rainbow sprinkles.
Notes
Additional serving suggestions: pair with a crisp salad, garlic bread, or roasted seasonal vegetables for balance.
For make-ahead, prep components separately and assemble just before heating to preserve texture.
Taste and adjust with acid (lemon/vinegar) and salt right at the end to wake up flavors.