Introduction
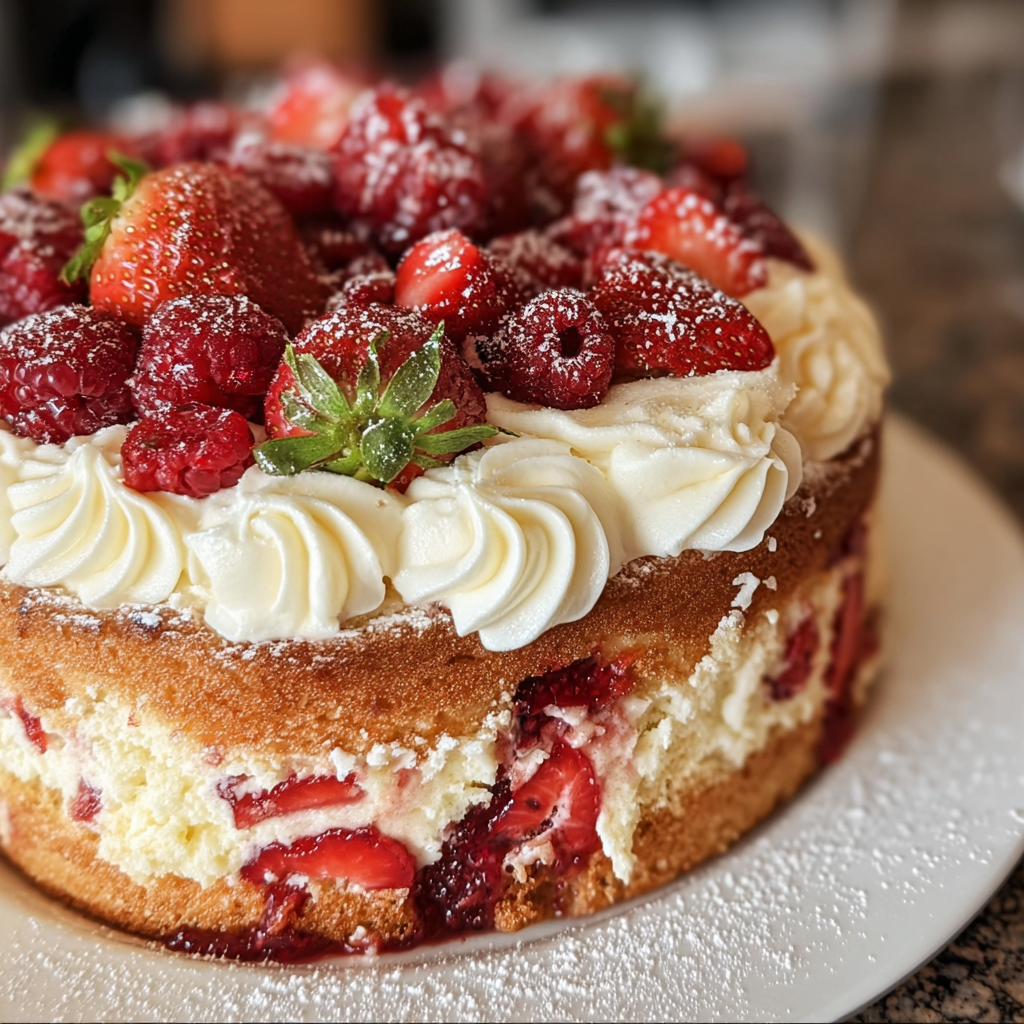
In the world of baking, few desserts embody the term 'heavenly' as completely as the Heaven on Earth Cake. Its layered nature combines fluffy cake, rich cream, and delicious fruit, creating an irresistible combination that leads to a euphoric experience with every bite.
This cake is perfect for any occasion—birthdays, holidays, or simply a special treat to indulge in after dinner. Whether you’re an experienced baker or new to the kitchen, this recipe guides you through crafting a dessert that feels like celebration in every layer.
Ingredients
- 2 cups all-purpose flour
All-purpose flour serves as the base for the cake's structure, providing stability and a soft crumb. It allows the cake to rise without becoming too dense, which is essential for achieving the lightness that characterizes this dessert. - 1 ½ cups granulated sugar
Sugar not only sweetens the cake but also contributes to its moistness and tenderness. As it melts during baking, sugar caramelizes slightly, enhancing the flavor and creating that lovely, golden crust. - 3 ½ teaspoons baking powder
Baking powder acts as a leavening agent, helping the cake achieve its airy texture. This ingredient is crucial for allowing the cake to rise properly and ensuring it does not turn out flat. - 1 teaspoon salt
Salt is essential for balancing flavors, enhancing the overall taste of the cake. It also plays a role in strengthening the protein structure of the flour, contributing to the texture. - 1 cup whole milk
Whole milk adds moisture to the cake, making it tender. The fat content in whole milk also enriches the flavor, giving the cake a creamy, sumptuous quality. - ½ cup unsalted butter, softened
Butter not only adds rich flavor but also creates a tender crumb by coating the flour proteins. Beating it with sugar incorporates air, which contributes to the cake's lightness. - 3 large eggs
Eggs provide moisture and richness, acting as a binding agent that holds everything together. They also help with rising, contributing to the cake's overall structure and density. - 1 teaspoon vanilla extract
Vanilla extract enhances the flavor profile of the cake, adding a fragrant depth that makes each bite comforting and familiar. It complements the sweetness and rounds out the taste beautifully. - 2 cups whipped cream
Whipped cream is the star of the layers, providing a luscious texture that complements the cake beneath. It adds a light, airy quality, enabling the cake to remain indulgent yet not too heavy. - 2 cups mixed berries (strawberries, blueberries, raspberries)
Fresh berries add natural sweetness and a burst of flavor that balances the richness of the cream and cake. They also introduce a refreshing acidity, making each layer even more delicious.
Directions & Preparation
Step 1: Preheat your oven to 350°F (175°C) and prepare two 9-inch round cake pans.
Preheating the oven is a crucial first step as it ensures even baking. Preparing the pans with butter and flour or parchment paper prevents the cake from sticking, allowing for a clean release once baked. This sets the stage for a smooth assembly later.
Step 2: In a large mixing bowl, whisk together the flour, baking powder, and salt.
Mixing the dry ingredients together ensures that the baking powder and salt are evenly distributed, which is key for even rising during baking. This step helps to prevent any pockets of salt or unactivated baking powder from affecting the cake’s texture.
Step 3: In another bowl, cream together the softened butter and sugar until light and fluffy.
Creaming butter and sugar aerates the mix, leading to a lighter cake. This process is essential for proper texture, as it helps incorporate air, setting up the basic structure that will hold the cake layers.
Step 4: Add the eggs one at a time, mixing until well combined after each addition, then stir in the vanilla extract.
Incorporating eggs one at a time allows for better emulsification, preventing the batter from curdling. It also ensures a consistent texture by evenly distributing the eggs throughout the batter.
Step 5: Gradually add the dry ingredients to the butter mixture, alternating with the milk, beginning and ending with flour.
Alternating the dry ingredients and milk helps prevent the batter from becoming too clumpy or too wet. This method ensures that the flour is properly hydrated, creating a batter that’s smooth and manageable.
Step 6: Divide the batter evenly between the prepared pans and smooth the tops.
Even distribution of batter is key to achieving uniform layers that will stack neatly without tilting. Smoothing the tops before baking ensures they set uniformly, contributing to an aesthetically pleasing final cake.
Step 7: Bake in the preheated oven for 25-30 minutes, or until a toothpick inserted into the center comes out clean.
Monitoring the baking time is essential to achieving the perfect moisture level. Overbaking can lead to dry layers, while underbaking can result in a gooey center. Trust your senses to gauge doneness.
Step 8: Allow the cakes to cool in the pans for 10 minutes, then transfer them to a wire rack to cool completely.
Cooling in the pans allows the cakes to firm up slightly, making them easier to handle. Transferring to a wire rack ensures proper airflow, preventing sogginess while you prepare the layers.
Step 9: Once cooled, whip the cream to soft peaks and gently fold in 1 tablespoon of sugar, if desired.
Whipping cream to soft peaks creates a light and airy texture essential for layering. Adding sugar helps balance the cream’s natural richness, enhancing sweetness without overpowering the cake's flavors.
Step 10: Place one cake layer on a serving platter and spread a generous amount of whipped cream over the top, followed by a layer of mixed berries.
Layering the whipped cream and berries adds a beautiful contrast in flavors and textures. The cream acts as a cushion for the berries, making the cake easier to slice while providing a delightful burst of freshness.
Step 11: Carefully add the second layer of cake and repeat the process of layering with whipped cream and berries on top.
This final assembly is where the cake truly earns its name. Ensuring each layer is generously filled with cream and fruit not only enhances freshness but also creates an eye-catching presentation.
Step 12: Finish with a final dollop of whipped cream and a scattering of remaining berries on top for garnish.
Garnishing the top with whipped cream and berries not only adds visual appeal but also invites your guests in with vibrant colors and textures. This finishing touch makes all the effort feel worthwhile.
Step 13: Chill the cake in the refrigerator for at least an hour before serving to allow the flavors to meld.
Chilling lets the cream firm up and the flavors to integrate, resulting in a more cohesive dessert. This resting period enhances the overall enjoyment, creating a cake that is just as delightful to taste as it is to look at.

The Importance of Layering Flavors
Layering flavors is a crucial aspect of the Heaven on Earth Cake, as it creates a complex taste experience. The interplay of vanilla-scented cake, luscious whipped cream, and tart berries achieves a delightful balance between sweet and refreshing. Each bite presents an array of textures and flavors, inviting the palate to explore the nuances and appreciate the artistry of baking.
Selecting the Right Berries
Choosing fresh, ripe berries is essential for this recipe's success. Opt for seasonal berries when possible, as they bring vibrant flavors and natural sweetness that elevate the cake. Strawberries, blueberries, and raspberries not only contribute to the taste but also provide stunning color contrast, making the cake visually appealing. Don't hesitate to mix and match to create your personal favorite berry combination!
Presentation Matters
When it comes to desserts, presentation can turn a good cake into a showstopper. Arrange berries artfully on top and consider using a cake stand to showcase your creation. The visual appeal is enhanced by the contrasting colors of the whipped cream and fruits. A beautiful presentation not only entices guests but also adds to the experience of enjoying your homemade Heaven on Earth Cake.
FAQs
Why is my cake too dense?
A dense cake often results from overmixing the batter, which develops the gluten in the flour. To achieve lightness, mix just until ingredients are combined.
What can I do if my whipped cream isn't firming up?
If your whipped cream isn't reaching stiff peaks, ensure you're using chilled equipment and heavy cream. Whip thoroughly and consider adding a stabilizer like powdered sugar.
Can I substitute other fruits for the berries?
Absolutely! Feel free to experiment with fruits like peaches, cherries, or even citrus segments. Just keep in mind to balance sweetness and acidity to complement the cream.
What to do if the cake is too sweet?
If overly sweet, balance flavors by topping with fresh, tart berries or serving with a side of unsweetened whipped cream to cut the sweetness.
How can I tell when the cake is done baking?
Look for a golden-brown top and use a toothpick: inserting it should come out clean or with a few moist crumbs—but not wet batter.
Why does my whipped cream taste bland?
If your whipped cream lacks flavor, a touch of vanilla extract or a hint of powdered sugar can enhance its sweetness and richness beautifully.
Conclusion
Creating a Heaven on Earth Cake may feel complex, but each layer is a step toward achieving a dessert that truly celebrates culinary craft. The balance of flavors and textures ensures it will be a hit on any occasion.
Whether you follow the recipe closely or make personal touches to it, this cake stands as a testament to the joy of home baking. Enjoy every slice, and let this cake transport you to a realm of flavor that feels like pure bliss.
Recipe Card

Heaven on Earth Cake: A Dreamy Dessert Delight
Ingredients
Method
- Preheat your oven to 350°F (175°C) and prepare two 9-inch round cake pans.
- In a large mixing bowl, whisk together the flour, baking powder, and salt.
- In another bowl, cream together the softened butter and sugar until light and fluffy.
- Add the eggs one at a time, mixing until well combined after each addition, then stir in the vanilla extract.
- Gradually add the dry ingredients to the butter mixture, alternating with the milk, beginning and ending with flour.
- Divide the batter evenly between the prepared pans and smooth the tops.
- Bake in the preheated oven for 25-30 minutes, or until a toothpick inserted into the center comes out clean.
- Allow the cakes to cool in the pans for 10 minutes, then transfer them to a wire rack to cool completely.
- Once cooled, whip the cream to soft peaks and gently fold in 1 tablespoon of sugar, if desired.
- Place one cake layer on a serving platter and spread a generous amount of whipped cream over the top, followed by a layer of mixed berries.
- Carefully add the second layer of cake and repeat the process of layering with whipped cream and berries on top.
- Finish with a final dollop of whipped cream and a scattering of remaining berries on top for garnish.
- Chill the cake in the refrigerator for at least an hour before serving to allow the flavors to meld.
Notes
Additional serving suggestions: pair with a crisp salad, garlic bread, or roasted seasonal vegetables for balance.
For make-ahead, prep components separately and assemble just before heating to preserve texture.
Taste and adjust with acid (lemon/vinegar) and salt right at the end to wake up flavors.