Introduction
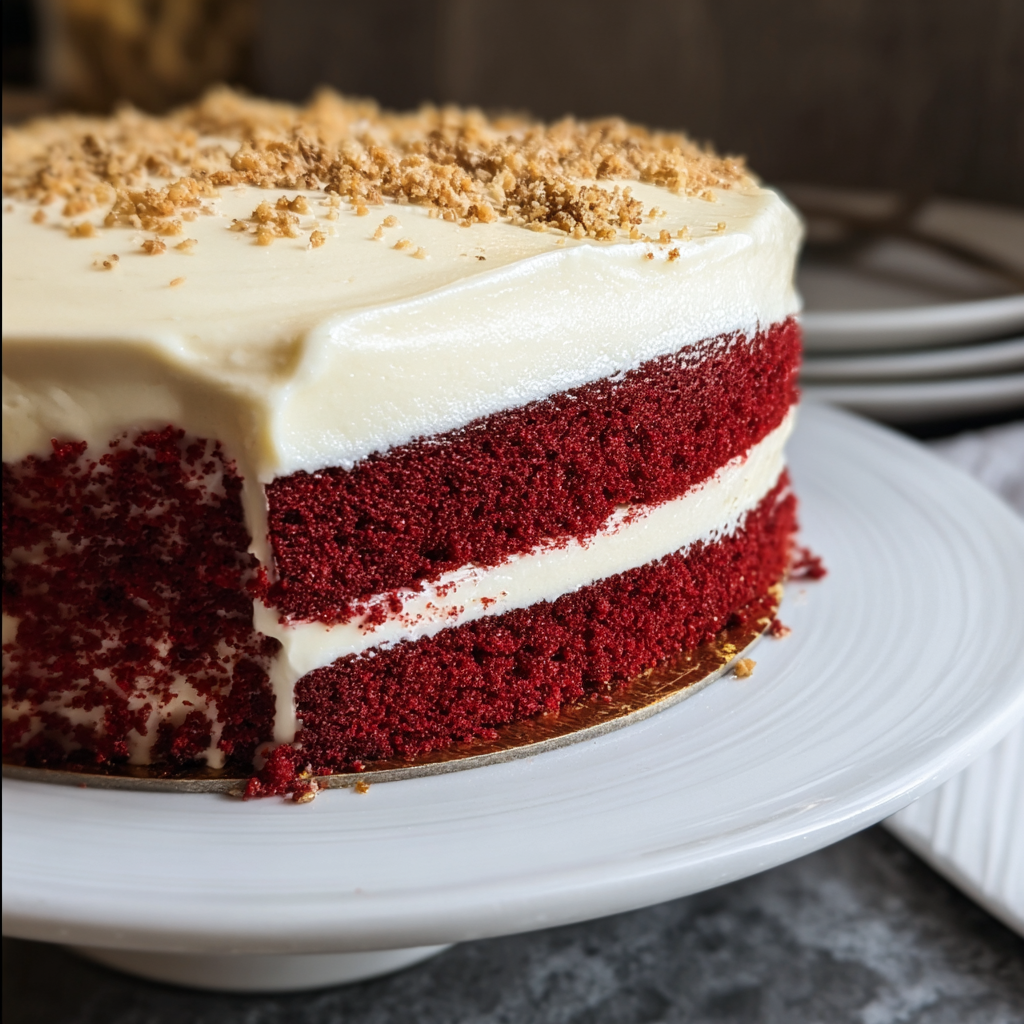
Red Velvet Cake is a stunning dessert choice that captivates both the eyes and the palate. Its vibrant red color contrasted with rich cream cheese frosting makes it a favorite for special occasions and celebrations. Beyond its striking appearance, this cake encompasses a unique flavor profile, blending hints of cocoa with a slight tang from the buttermilk.
While often associated with southern traditions, Red Velvet Cake has garnered a global following. Whether you are preparing for a birthday, anniversary, or simply seeking a treat to brighten your day, crafting this cake at home is an excellent way to enjoy its delightful taste while sharing the joys of baking with loved ones.
Ingredients
- 2 1/2 cups all-purpose flour
The base of the cake, all-purpose flour provides structure and stability. It helps the cake rise while ensuring a tender crumb. - 1 1/2 cups granulated sugar
Sugar not only sweetens the cake but also contributes to its texture. It helps retain moisture and adds to the cake's lightness. - 1 teaspoon baking soda
Baking soda is a leavening agent that reacts with acidic ingredients, creating carbon dioxide which helps the cake rise. - 1 teaspoon salt
Salt enhances the flavors in the cake and balances the sweetness, ensuring a well-rounded taste. - 1 cup vegetable oil
Oil adds moisture and richness to the cake, making it soft and tender compared to butter. - 1 cup buttermilk
Buttermilk adds a tangy flavor to the cake while also reacting with baking soda to create extra rise and lift. - 2 large eggs
Eggs provide structure and stability to the cake while also helping to bind the ingredients together. - 2 tablespoons cocoa powder
Cocoa powder adds a subtle chocolate flavor that balances the cake's sweetness and contributes to its beautiful color. - 2 tablespoons red food coloring
The signature ingredient that gives Red Velvet Cake its iconic deep red hue, enhancing its visual appeal. - 1 teaspoon vanilla extract
Vanilla extract adds an aromatic sweetness that complements the other flavors in the cake. - 8 oz cream cheese
Essential for the frosting, cream cheese provides a rich and tangy flavor that perfectly balances the cake's sweetness. - 2 cups powdered sugar
Powdered sugar is used to sweeten the frosting and gives it a smooth and creamy texture when blended with cream cheese. - 1/2 cup unsalted butter
Butter adds richness and flavor to the frosting, creating a luscious finish to the cake.
Directions & Preparation
Step 1: Preheat your oven to 350°F (175°C).
Preheating the oven ensures that the cake bakes evenly. When the batter is ready to go in, the oven should be hot enough to start cooking the cake from the first moment it hits the heat.
Step 2: Grease and flour two 9-inch round cake pans.
Properly greasing and flouring the pans is critical to prevent sticking. This will ensure that your cakes slide out easily once baked and help maintain their perfect shape.
Step 3: In a large bowl, combine the flour, cocoa powder, baking soda, and salt. Whisk until well blended.
Mixing the dry ingredients first is important for even distribution of the leavening agent and cocoa. This step prevents clumping and ensures that all the flavors are well incorporated.
Step 4: In another bowl, whisk together the oil, sugar, eggs, and vanilla until smooth.
Whisking the wet ingredients helps to aerate the mixture, leading to a light and fluffy cake. It also mixes the sugar thoroughly, promoting a uniform sweetness throughout.
Step 5: Add buttermilk and red food coloring to the wet mixture, mixing until combined.
This step introduces acidity from the buttermilk, which reacts with the baking soda to create lift. The red food coloring enhances the cake's signature color, so ensure it is uniformly incorporated.
Step 6: Gradually add the dry ingredients to the wet mixture, stirring until just combined.
Overmixing at this stage can develop gluten, leading to a denser cake. Stir gently and stop as soon as there are no visible flour pockets.
Step 7: Divide the batter evenly between the prepared cake pans and smooth the tops.
Even distribution of the batter ensures that both layers bake at the same rate, which is vital for stacking once they’ve cooled.
Step 8: Bake for 25-30 minutes or until a toothpick inserted in the center comes out clean.
Baking times may vary, so keeping an eye on your cakes as they near the end time is essential. A clean toothpick means the cakes are done, while being careful not to overbake will keep them moist.
Step 9: Allow the cakes to cool in the pans for 10 minutes before transferring to wire racks.
Letting the cakes cool slightly in the pans prevents them from breaking apart due to sudden temperature changes. Transferring them to wire racks ensures they cool evenly and completely.
Step 10: While the cakes cool, prepare the cream cheese frosting by beating together the cream cheese and butter until smooth.
Achieving a smooth and creamy texture in the frosting is crucial for spreading. Beating the ingredients together well eliminates lumps and ensures a consistent flavor.
Step 11: Gradually add powdered sugar and beat until fluffy.
Adding powdered sugar gradually prevents clumping and allows for better mixing. Beat until well combined and fluffy for a light, spreadable frosting.
Step 12: Once the cakes are cool, place one layer on a serving plate and spread frosting on top.
Frosting between layers not only adds flavor but also helps to bind the cakes together. Make sure the layer is even for a beautiful presentation.
Step 13: Top with the second layer and frost the top and sides of the cake entirely.
Covering the cake with frosting not only enhances flavor but also provides a protective layer, keeping the cake moist. Take your time to create a smooth finish.
Step 14: You can decorate with additional sprinkles or berries on top if desired, then slice and serve.
Adding garnishes can elevate the visual appeal of your cake. Use fresh fruits or simply leave it bare to highlight the vibrant red color.

The Role of Red Food Coloring
Red food coloring is integral to the characteristic appearance of Red Velvet Cake. The vibrant hue, accentuated by the cake's rich textures, makes it a standout dessert. The specific shade can be adjusted based on preference; more color results in a deeper red, while less offers a subtler look. It's essential to use high-quality food coloring to achieve that iconic color without compromising taste.
Perfecting the Cream Cheese Frosting
Cream cheese frosting is the ideal complement to the slightly tangy Red Velvet Cake. To achieve the perfect consistency, ensure that both the cream cheese and butter are at room temperature before mixing. This allows them to blend seamlessly, creating a luscious, creamy texture. Balance the sweetness of the frosting by adjusting the sugar, ensuring it never overpowers the cake's subtle chocolate notes.
Baking Tips for a Moist Cake
A moist cake is the hallmark of a successful Red Velvet. To ensure this, avoid overmixing the batter and consider the freshness of your ingredients, particularly the baking soda and buttermilk. Additionally, check that your oven temperature is accurate with an oven thermometer, as even slight variations can affect the cake's texture. Lastly, remember that cakes tend to continue baking after being removed from the oven, so be cautious not to overbake.
FAQs
Why does my cake have a light color instead of deep red?
If the acidity in your buttermilk was too low, or if you used natural cocoa powder instead of Dutch-processed, the cake may not achieve the desired red color. Ensure you're using regular red food coloring and check the fat content in your buttermilk.
My cake turned out dry. What did I do wrong?
Overbaking or using too much flour can lead to dryness. Always measure flour correctly, preferably by weight, and make sure to check doneness a few minutes before the timer goes off.
How can I adjust the sweetness of my frosting?
If your frosting is too sweet, consider adding a pinch of salt to balance it out. You can also increase the amount of cream cheese, which brings a tangy flavor that counters the sweetness.
What should I do if my batter is too thick?
If your batter is too thick, gradually add a bit more buttermilk, one tablespoon at a time, until it reaches a pourable consistency. Be sure to mix gently to avoid overworking the batter.
How can I make a smaller cake without altering flavor?
To make a smaller cake, you can halve the recipe and use smaller cake pans. Just maintain the same baking temperature but adjust the time for smaller layers.
Why did my cake rise unevenly?
Uneven rising can occur if your oven temperature is inconsistent or if the batter was not mixed evenly. Ensure thorough mixing and check your oven calibration for accurate baking.
Conclusion
Baking a Red Velvet Cake can seem intimidating, but with careful attention to detail and quality ingredients, it becomes a rewarding experience. Its unique flavor profile combined with the stunning visual appeal makes it worth every effort.
Whether it’s for a celebration or a simple family gathering, this cake is sure to impress. Enjoy the process of creating this delightful masterpiece, and don’t shy away from sharing your delicious results with others.
Recipe Card

Indulge in the Deliciousness of Red Velvet Cake
Ingredients
Method
- Preheat your oven to 350°F (175°C).
- Grease and flour two 9-inch round cake pans.
- In a large bowl, combine the flour, cocoa powder, baking soda, and salt. Whisk until well blended.
- In another bowl, whisk together the oil, sugar, eggs, and vanilla until smooth.
- Add buttermilk and red food coloring to the wet mixture, mixing until combined.
- Gradually add the dry ingredients to the wet mixture, stirring until just combined.
- Divide the batter evenly between the prepared cake pans and smooth the tops.
- Bake for 25-30 minutes or until a toothpick inserted in the center comes out clean.
- Allow the cakes to cool in the pans for 10 minutes before transferring to wire racks.
- While the cakes cool, prepare the cream cheese frosting by beating together the cream cheese and butter until smooth.
- Gradually add powdered sugar and beat until fluffy.
- Once the cakes are cool, place one layer on a serving plate and spread frosting on top.
- Top with the second layer and frost the top and sides of the cake entirely.
- You can decorate with additional sprinkles or berries on top if desired, then slice and serve.
Notes
Additional serving suggestions: pair with a crisp salad, garlic bread, or roasted seasonal vegetables for balance.
For make-ahead, prep components separately and assemble just before heating to preserve texture.
Taste and adjust with acid (lemon/vinegar) and salt right at the end to wake up flavors.