Introduction
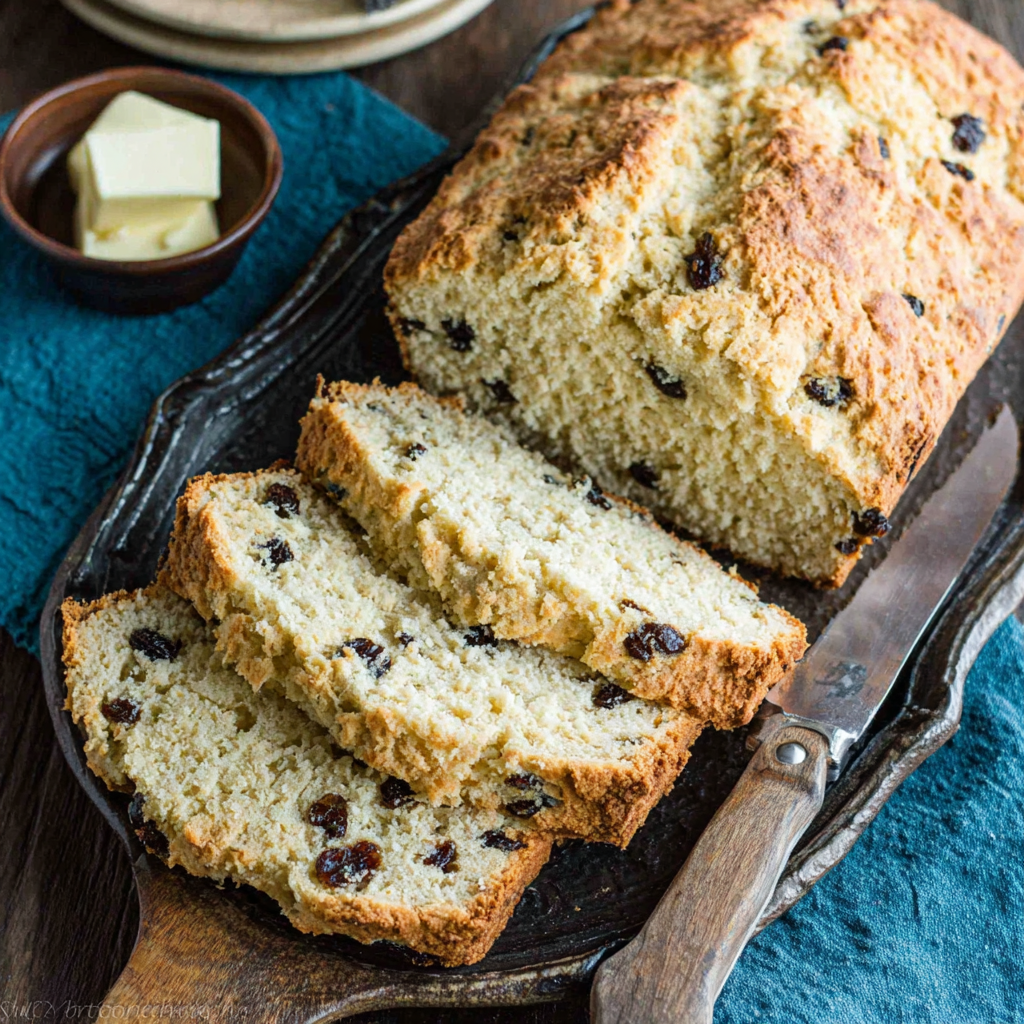
Irish Soda Bread is a beloved staple that brings the warmth of the Emerald Isle to our homes. With its crisp crust and soft interior, this quick-bread delight has become a cherished recipe passed down through generations. What sets it apart from traditional yeast breads is the use of baking soda as a leavening agent, making it incredibly easy and quick to prepare.
Unlike bread that requires time for kneading and rising, Irish Soda Bread can be mixed and baked in under an hour. The simplicity, combined with the rich flavor profile, makes it a perfect accompaniment to soups, stews, or simply slathered with butter. Whether you’re gathering with friends or enjoying a quiet evening at home, the aroma of freshly baked Soda Bread will elevate your cooking experience.
Ingredients
- 4 cups all-purpose flour
Flour acts as the primary structure for the bread. All-purpose flour provides the necessary gluten for strength, allowing the bread to rise. Too much flour can lead to a dense texture, so measuring accurately is crucial. - 1 teaspoon baking soda
Baking soda serves as the leavening agent, reacting with the acidity of buttermilk to produce carbon dioxide bubbles that help the bread rise. Using fresh baking soda is important to ensure proper leavening. - 1 teaspoon salt
Salt enhances the overall flavor of the bread. It balances sweetness and promotes better fermentation, even in soda bread. Too little salt can result in a bland taste. - 1 ¾ cups buttermilk
Buttermilk not only provides acidity, which activates the baking soda, but also contributes to moisture and tenderness in the bread. If buttermilk is unavailable, a mix of milk and vinegar can be used as a substitute.
Directions & Preparation
Step 1: Preheat your oven to 425°F (220°C).
Preheating the oven ensures that the bread bakes evenly from the start, resulting in a proper rise. A hot oven creates steam, which is essential for achieving a crusty exterior while keeping the inside light and airy.
Step 2: In a large mixing bowl, combine the flour, baking soda, and salt.
Sifting or whisking these dry ingredients together helps to distribute the baking soda evenly throughout the flour. This step is crucial, as it ensures that the leavening agent is uniformly mixed, preventing any uneven rising during baking.
Step 3: Make a well in the center of the dry ingredients and pour in the buttermilk.
Creating a well allows the liquid to be incorporated gradually, minimizing the risk of overmixing the dough. Overmixing can lead to a tough bread; therefore, it's essential to mix only until just combined.
Step 4: Mix the ingredients gently until a soft dough forms, being careful not to overwork it.
At this point, the dough should be slightly sticky but manageable. Overmixing can develop too much gluten, leading to a denser texture. A few visible bits of flour are fine; they will incorporate while shaping.
Step 5: Turn the dough onto a lightly floured surface and shape it into a round loaf.
Gently shaping the dough ensures that it retains as much air as possible. The round shape allows for even cooking and also creates a classic appearance. Avoid being too rough, as this can deflate the dough.
Step 6: Place the shaped loaf on a baking sheet lined with parchment paper.
Parchment paper prevents sticking and makes cleanup easier. Also, spacing the loaf properly allows hot air to circulate during baking, ensuring even cooking all around.
Step 7: Score the top of the loaf with a deep cross, cutting about ½ inch into the dough.
Scoring the bread creates steam vents, allowing it to rise properly and form a crust. This traditional cross is a nod to Irish heritage, often said to ward off evil spirits.
Step 8: Bake for 30-35 minutes, or until the loaf is golden brown and sounds hollow when tapped.
The baking time is crucial for developing the loaf's texture and flavor. Tapping the bottom of the bread and listening for a hollow sound indicates it's done. A golden crust also signifies that the bread is ready to be devoured.
Step 9: Remove from the oven and cool on a wire rack for at least 10 minutes before slicing.
Cooling allows the steam to escape, preventing the bread from becoming soggy. Slicing too early can result in gummy interiors, while waiting allows the flavors to settle for a more satisfying bite.

Understanding the Importance of Buttermilk
Buttermilk plays a pivotal role in the texture and flavor of Irish Soda Bread. Its acidity not only activates the baking soda, promoting the loaf's rise, but it also enhances tenderness. The tangy flavor of buttermilk distinguishes soda bread from other quick breads, enriching its profile. For the best results, always opt for fresh buttermilk, ensuring optimal chemical reactions during baking.
The Art of Scoring Bread
Scoring the surface of the bread is not merely decorative; it is essential for proper expansion during baking. The cuts help regulate steam release, allowing the loaf to rise without splitting unpredictably. Traditionally, the cross signifies various cultural meanings while serving a practical purpose. The technique enhances both the appearance and texture of the finished product, making it a fundamental step.
Serving Suggestions and Pairing Ideas
Irish Soda Bread is versatile and allows for creative serving options. It pairs beautifully with rich soups, stews, and classic Irish dishes like colcannon. For a sweet twist, enjoy it with jam or honey for breakfast. Additionally, serving it warm with a slab of butter melts beautifully into the bread, creating an indulgent treat that complements its rustic character.
FAQs
What should I do if my dough is too wet?
If the dough appears too wet, incorporate small amounts of flour, a tablespoon at a time, until it reaches a manageable consistency. Avoid adding too much flour to prevent a dense bread.
How can I adjust the recipe for a smaller loaf?
To make a smaller loaf, halve the quantities of each ingredient. You can bake it in a smaller pan, checking for doneness earlier to prevent overbaking.
Why did my bread turn out dense?
A dense loaf can result from overmixing the dough or using stale baking soda. Be sure to mix just until combined and use fresh ingredients to ensure proper leavening.
Can I add herbs or cheese to the dough?
Absolutely! You can fold in shredded cheese, chopped herbs, or even nuts and dried fruits for added flavor. Adjust the flour slightly to accommodate for moisture.
How do I know when the bread is fully baked?
Besides the golden color, tapping the bottom of the loaf should yield a hollow sound, indicating it's done. An internal temperature of about 190°F (88°C) is ideal.
What if my bread crust is too hard?
A hard crust may result from baking at too high a temperature or for too long. Try lowering the oven temperature slightly or covering the loaf with foil if it darkens too quickly.
Conclusion
Making Irish Soda Bread at home is a rewarding experience steeped in tradition. The simplicity of the recipe allows for experimentation while staying true to its roots. Whether enjoyed fresh out of the oven or toasted the next day, its comforting flavors resonate with anyone lucky enough to taste it.
As you gather with loved ones, share stories, and savor each bite, you not only nourish your body but also connect to the rich cultural tapestry of Irish heritage. Embrace this delightful bread, and let it bring warmth and joy to your kitchen.
Recipe Card
Embrace Tradition with Authentic Irish Soda Bread
Ingredients
Method
- Preheat your oven to 425°F (220°C).
- In a large mixing bowl, combine the flour, baking soda, and salt.
- Make a well in the center of the dry ingredients and pour in the buttermilk.
- Mix the ingredients gently until a soft dough forms, being careful not to overwork it.
- Turn the dough onto a lightly floured surface and shape it into a round loaf.
- Place the shaped loaf on a baking sheet lined with parchment paper.
- Score the top of the loaf with a deep cross, cutting about ½ inch into the dough.
- Bake for 30-35 minutes, or until the loaf is golden brown and sounds hollow when tapped.
- Remove from the oven and cool on a wire rack for at least 10 minutes before slicing.
Notes
Additional serving suggestions: pair with a crisp salad, garlic bread, or roasted seasonal vegetables for balance.
For make-ahead, prep components separately and assemble just before heating to preserve texture.
Taste and adjust with acid (lemon/vinegar) and salt right at the end to wake up flavors.