Introduction
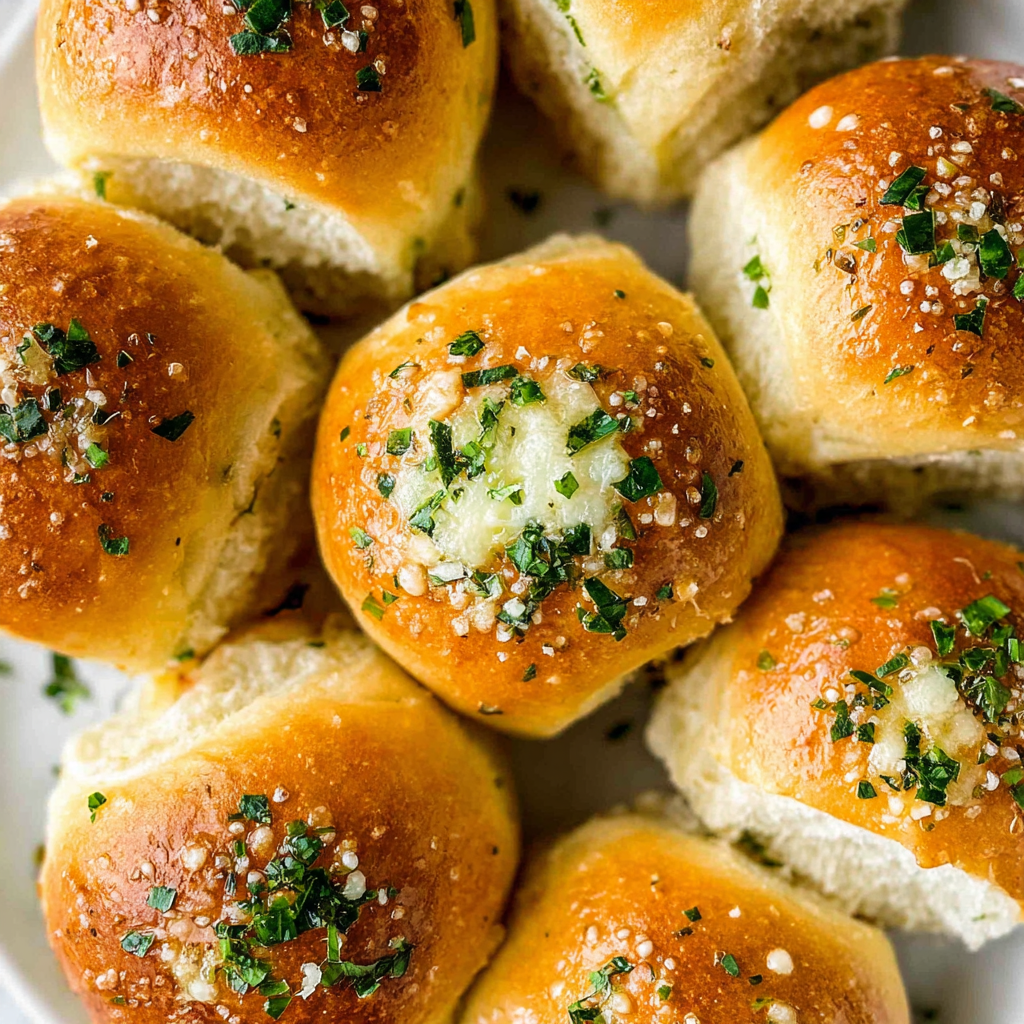
Garlic bread rolls are a delightful addition to any dining table, providing a combination of buttery richness and aromatic garlic that elevates your meal. These rolls are not just a side; they can serve as the perfect companion to soups, salads, or any hearty main dish. Making them at home allows you to customize flavors and enjoy a fresh, warm treat straight from the oven.
By incorporating a few simple ingredients, you can create rolls that are soft, fluffy, and infused with the irresistible essence of garlic. The beauty of garlic bread rolls lies in their versatility; you can enjoy them as they are or experiment with herbs and cheeses to create a unique flavor profile. Let’s dive into this recipe that promises to become a staple in your kitchen.
Ingredients
- 2 cups all-purpose flour
This is the backbone of the rolls, providing structure and texture. All-purpose flour has a balanced protein content that helps create a chewy interior. Sifting the flour beforehand can also help to aerate it, making your rolls lighter. - 1 teaspoon salt
Salt enhances the flavor of the rolls and also strengthens the gluten structure. It plays a crucial role in fermenting the yeast, ensuring that the rolls rise properly while preventing an overly doughy texture. - 1 packet (2 1/4 teaspoons) active dry yeast
Yeast is what makes the rolls rise and become fluffy. When activated, it ferments the sugar present in the dough, releasing carbon dioxide, which creates air pockets and leavening. Ensuring the yeast is fresh is pivotal for a successful bake. - 1 tablespoon sugar
Sugar acts as food for the yeast, helping it to activate and multiply. It also contributes to the browning of the rolls during baking, resulting in a beautiful golden crust that is visually appealing and delicious. - 3/4 cup warm water
Warm water is used to activate the yeast and help it dissolve properly. It should be around 110°F to promote yeast activity without killing it. Too hot water can deactivate the yeast, leading to flat rolls. - 4 tablespoons unsalted butter, melted
Butter adds richness and moisture to the rolls, creating a tender crumb. It also enhances flavor and contributes to the rolls’ shiny appearance once baked, making them irresistible. - 3-4 cloves garlic, minced
Garlic is the star ingredient, adding a robust flavor that characterizes garlic bread. Freshly minced garlic provides a stronger taste than powdered versions, and when baked, it mellows but retains a delightful aroma. - 1 tablespoon fresh parsley, chopped (optional)
Parsley adds a fresh herbal note that complements the garlic well. It brightens the flavor profile and gives the rolls a touch of color, elevating their visual appeal without overpowering the garlic.
Directions & Preparation
Step 1: Activate the yeast.
In a small bowl, combine warm water and sugar, then sprinkle the yeast on top. Let it sit for about 5-10 minutes until it becomes frothy. This step matters because it confirms that your yeast is alive; if it doesn’t froth, consider starting over with fresh yeast. It’s also essential for creating the light, airy texture of the rolls.
Step 2: Mix dry ingredients.
In a large mixing bowl, whisk together the flour and salt. This ensures even distribution of the salt, which is crucial for flavor and proper yeast activation. By combining these ingredients first, you’re preparing a solid foundation for your dough.
Step 3: Combine wet ingredients.
Add the melted butter, minced garlic, and the frothy yeast mixture to the flour. Stir the mixture until it begins to come together. This step is critical as it combines all the flavors, ensuring that the garlic is evenly incorporated throughout the dough.
Step 4: Knead the dough.
Turn the dough onto a floured surface and knead it for about 8-10 minutes until smooth and elastic. Kneading develops the gluten in the flour, which is essential for the rolls' structure. You’ll know the dough is ready when it springs back when pressed, indicating sufficient kneading.
Step 5: First rise.
Place the kneaded dough in a lightly greased bowl, cover it with a damp cloth or plastic wrap, and let it rise in a warm place for 1-2 hours until it doubles in size. This rising time allows the flavor to develop and the texture to become light and airy; patience will yield the best results.
Step 6: Shape the rolls.
After the dough has risen, punch it down gently to release any air pockets. Divide it into equal pieces, shape each piece into a round roll, and place them on a baking sheet lined with parchment. This shaping step is essential for creating evenly sized rolls that will bake uniformly.
Step 7: Second rise.
Cover the shaped rolls with a towel and let them rise for another 30-45 minutes. This second rise is crucial for achieving that light, fluffy texture. Keeping the rolls covered during this time prevents them from drying out and ensures they rise properly.
Step 8: Preheat the oven.
While the rolls are rising, preheat your oven to 375°F (190°C). This ensures that the rolls go into a hot oven, which is crucial for good oven spring. Preheating also helps to achieve that golden-brown crust everyone loves.
Step 9: Bake the rolls.
Once the rolls have puffed up, bake them in the preheated oven for 15-20 minutes until golden brown. Keep an eye on them as baking times may vary based on your oven. Proper baking completes the transformation, creating a crust that contrasts beautifully with the soft interior.
Step 10: Cool and serve.
Remove the rolls from the oven and allow them to cool slightly before serving. This resting period lets the flavors settle and prevents burning your fingers upon serving. Serve warm with additional garlic butter for that extra indulgence.

Experimenting with Flavors
Garlic bread rolls offer an excellent base for experimentation. You can enhance the flavor by incorporating various herbs like thyme or rosemary, or mixing different cheeses such as mozzarella or parmesan into the dough. Adding roasted garlic can mellow the flavor and introduce a unique depth. Don’t hesitate to play around and discover your perfect combination.
The Perfect Pairing
These rolls pair wonderfully with a vast array of dishes, making them incredibly versatile. They can complement a robust spaghetti bolognese, a light vegetable soup, or even a fresh garden salad. Their soft texture and garlic goodness can balance a variety of flavors, making each meal feel special. Consider enjoying them alongside a dipping sauce for an additional flavor burst.
Rolls for Every Occasion
Garlic bread rolls are not just a meal addition but can also shine in social settings. They are perfect for gatherings, potlucks, or family dinners, bringing warmth and comfort to any table. Their appealing aroma as they bake adds to the atmosphere, and guests will appreciate the homemade touch. Serve them as a snack with olive oil or balsamic vinegar for a delightful appetizer.
FAQs
What if my dough doesn’t rise?
If your dough fails to rise, it may be due to expired yeast or incorrect water temperature. Always check the yeast freshness, and ensure the water is warm but not too hot. Placing the dough in a warm environment can also help kickstart the rising process.
Can I use whole wheat flour instead of all-purpose flour?
Yes, you can substitute up to half of the all-purpose flour with whole wheat flour for a nuttier flavor and added nutrition. However, you may need to adjust the liquid slightly since whole wheat flour absorbs more moisture.
How can I avoid rolling tough bread?
To prevent tough rolls, be careful not to over-knead the dough or add too much flour. Knead just until the dough is smooth and elastic. Additionally, allowing adequate rising time is crucial for achieving light, fluffy rolls.
Why are my rolls too bland?
If your rolls taste bland, consider enhancing with more garlic or seasoning. Adding herbs or cheese into the dough can provide additional flavor. Brush the tops with garlic butter before baking for an aromatic finish.
What happens if I add too much butter?
Adding too much butter can make the dough greasy and heavy, affecting the texture of the rolls. Stick to the recipe and, if you want a richer flavor, add a bit more on top after baking.
How do I know when the rolls are done baking?
The rolls should be golden brown on top and sound hollow when tapped on the bottom. A digital thermometer can also help; they should register around 190°F (88°C) when fully baked.
Conclusion
Homemade garlic bread rolls are a beautiful combination of simplicity and flavor, making them an excellent choice for any meal. The satisfaction of enjoying warm rolls fresh from the oven cannot be overstated. With a few adjustments, you can tailor this recipe to fit your taste preferences and occasions.
Whether paired with pasta, used for a comforting sandwich, or enjoyed on their own, these rolls will become a beloved feature in your kitchen. So, roll up your sleeves, gather your ingredients, and embrace the joy of baking these delightful treats.
Recipe Card
Indulgent Garlic Bread Rolls for Any Meal
Ingredients
Method
- Activate the yeast.
- Mix dry ingredients.
- Combine wet ingredients.
- Knead the dough.
- First rise.
- Shape the rolls.
- Second rise.
- Preheat the oven.
- Bake the rolls.
- Cool and serve.
Notes
Additional serving suggestions: pair with a crisp salad, garlic bread, or roasted seasonal vegetables for balance.
For make-ahead, prep components separately and assemble just before heating to preserve texture.
Taste and adjust with acid (lemon/vinegar) and salt right at the end to wake up flavors.