Introduction
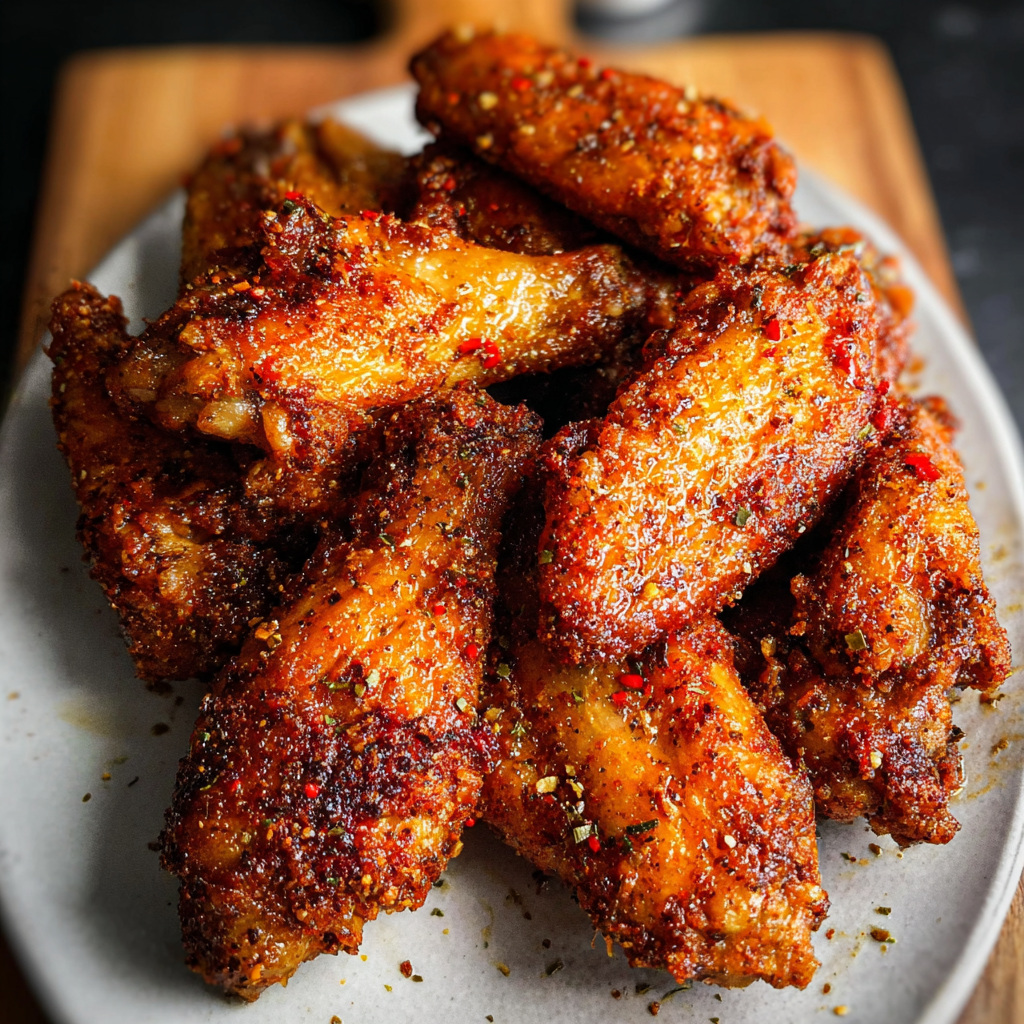
Crispy dry rub chicken wings are a game-winner for any gathering. These wings pack a punch of flavor without the need for messy sauces, allowing the natural taste of the chicken to shine. Cooking them to crispy perfection in the oven or fryer enhances the experience, making them a favorite among home cooks and guests alike.
The beauty of these wings lies in the dry rub. It's a simple yet powerful blend of spices that elevates the dish. As the wings cook, the spices form a crunchy crust, delivering a delightful crunch with every bite. Get ready to impress your friends and family with this uncomplicated and satisfying recipe!
Ingredients
- 2 pounds chicken wings
Wings are the star of the dish; they provide the base for the crispy texture and absorb the flavors of the dry rub. Choosing fresh wings ensures a juicy interior. - 2 tablespoons baking powder
Baking powder is a crucial ingredient for achieving that light, crispy skin. It helps draw moisture out of the skin, allowing it to crisp up during cooking. - 1 tablespoon paprika
Paprika adds a mild sweetness and striking color to the wings. It contributes to the overall flavor profile and enhances the visual appeal. - 1 tablespoon garlic powder
Garlic powder infuses a savory depth to the seasoning mix without the risk of burning that fresh garlic can have, offering an even distribution of flavor. - 1 tablespoon onion powder
Onion powder complements the garlic by providing a subtle sweetness that balances the savory notes. It ensures a harmonious blend in the spice mix. - 1 teaspoon cayenne pepper
Cayenne pepper introduces a zesty kick to the wings, enhancing the flavor without overpowering the other spices. Adjust to taste based on your spice tolerance. - 1 teaspoon black pepper
Black pepper is essential for a bit of heat and complexity. It rounds out the flavors and enhances the overall taste of the dry rub. - 1 teaspoon salt
Salt is a key component that brings all the flavors together. It enhances the natural flavors of the chicken wings and the spices.
Directions & Preparation
Step 1: Preheat the oven to 425°F (220°C).
Preheating ensures that the wings start cooking at the right temperature, which is essential for achieving that crispy skin. An oven set at 425°F effectively allows for even cooking while ensuring the skin crisps up beautifully.
Step 2: Prepare the chicken wings by patting them dry with paper towels.
Removing excess moisture is crucial for creating crispy wings. Patting them dry helps the skin crisp and prevents steaming during the cooking process. It’s a simple but effective step you won’t want to skip.
Step 3: In a bowl, combine the baking powder, paprika, garlic powder, onion powder, cayenne pepper, black pepper, and salt.
This step allows the flavors to meld together before coating the wings. Mixing the dry ingredients ensures an even distribution of spices, which leads to well-seasoned wings when applied.
Step 4: Toss the dried wings in the spice mixture until well coated.
Coating the wings thoroughly in the spice blend allows the flavors to penetrate the chicken as it cooks. Ensure each piece is evenly covered for consistent flavor and texture.
Step 5: Place the wings on a wire rack set over a baking sheet.
Using a wire rack enables air circulation around the wings, allowing heat to reach every angle for even cooking. It also helps any rendered fat drip away, preventing soggy wings.
Step 6: Bake the wings in the preheated oven for 40-45 minutes, flipping halfway through.
Flipping the wings promotes even browning and crispiness on both sides. Baking at this temperature also ensures the wings cook through without drying out.
Step 7: Check for doneness; wings should be crispy and golden.
Visual cues are critical here; look for a deep golden-brown color and crispy texture. Use a meat thermometer to ensure that the internal temperature reaches 165°F (74°C) for safety.
Step 8: Allow the wings to rest for 5 minutes before serving.
Resting helps redistribute the juices, keeping the meat juicy while allowing the skin to maintain its crispiness. This crucial step prevents the wings from being too hot when consumed and enhances flavor.

The Science Behind Crispy Skin
Achieving that sought-after crispy skin is more than just chance; it's rooted in science. The use of baking powder raises the pH level of the chicken skin, which helps break down proteins and moisture, leading to a crackling finish when subjected to high heat. This technique, paired with the proper drying of the wings, contributes to a texture that meets the ideal crunch and tenderness.
Customizing Your Dry Rub
The beauty of a dry rub lies in its versatility. While the provided recipe offers a balanced flavor, feel free to tweak it by adding other spices such as cumin for an earthier tone or brown sugar for a sweet contrast. Personalizing the rub not only caters to your taste preferences but also allows you to explore diverse flavor profiles, making every batch of wings unique.
Serving Suggestions for Wings
Crispy dry rub chicken wings make an excellent start to any meal or can stand alone as the star dish at gatherings. Pair them with a variety of dips such as ranch or blue cheese for a classic touch. Incorporating sides such as celery and carrot sticks can provide a crunchy, refreshing contrast to the wings, while a zesty dipping sauce elevates the flavor even further.
FAQs
What if my wings are not crispy enough?
If your wings aren't crispy, ensure they are dried thoroughly before applying the rub and consider increasing the baking time. Baking them on a wire rack promotes airflow, which is essential for crispiness.
Can I scale this recipe for a larger crowd?
Absolutely! Just double the ingredients and the method remains the same. Ensure your oven has enough space or bake in batches to keep them crispy.
Can I use a different type of chicken?
Yes, drumsticks or boneless chicken tenders can also work, but cooking times may vary. Use a meat thermometer to check doneness.
How do I manage spice levels in the dry rub?
Adjust the cayenne pepper according to your spice tolerance. Start with half the amount and taste the mix before applying.
What should I do if the dry rub is too thick?
If the rub feels too thick, you can thin it out by adding a small amount of olive oil. This will help the flavors stick without overpowering the chicken.
Is it possible to cook these wings on the grill?
Yes, you can grill the wings instead. Preheat the grill to medium-high heat, and cook using direct heat for a smoky flavor, ensuring to check for even cooking.
Conclusion
Crispy dry rub chicken wings are a fantastic way to enjoy this classic dish with a unique twist. With easy-to-find ingredients and straightforward methods, you can create restaurant-quality wings right at home.
Whether for a game day gathering, a casual dinner, or a celebratory feast, these wings are bound to be a hit. Enjoy the satisfying crunch and rich flavors that make these wings unforgettable!
Recipe Card
Crispy Dry Rub Chicken Wings for Flavorful Bites
Ingredients
Method
- Preheat the oven to 425°F (220°C).
- Prepare the chicken wings by patting them dry with paper towels.
- In a bowl, combine the baking powder, paprika, garlic powder, onion powder, cayenne pepper, black pepper, and salt.
- Toss the dried wings in the spice mixture until well coated.
- Place the wings on a wire rack set over a baking sheet.
- Bake the wings in the preheated oven for 40-45 minutes, flipping halfway through.
- Check for doneness; wings should be crispy and golden.
- Allow the wings to rest for 5 minutes before serving.
Notes
Additional serving suggestions: pair with a crisp salad, garlic bread, or roasted seasonal vegetables for balance.
For make-ahead, prep components separately and assemble just before heating to preserve texture.
Taste and adjust with acid (lemon/vinegar) and salt right at the end to wake up flavors.