Introduction
Bounty Chocolate Bars hold a special place in the hearts of many chocolate lovers. With their signature blend of rich chocolate and chewy coconut, they offer a delightful treat that's hard to resist. Making these bars at home not only allows you to enjoy their delicious flavors but also gives you control over the quality of ingredients.
Creating your own Bounty bars can be a fun activity in the kitchen, whether for a special occasion or just to satisfy a craving. Plus, the satisfaction of biting into a homemade chocolate bar is unmatched. Let’s dive into crafting these delightful confections with a blend of coconut, chocolate, and a little bit of patience.
Ingredients
- 400g desiccated coconut
Desiccated coconut provides the essential texture and flavor for the filling. Its high fiber content gives the bars a chewy bite, making each morsel satisfying. - 200g condensed milk
Condensed milk acts as a binding agent and sweetener, ensuring the coconut mixture holds together while adding a creamy sweetness to the bars. - 200g dark chocolate
Dark chocolate will encase the coconut filling, providing a rich contrast to the sweetness of the coconut and condensed milk, enhancing the overall flavor profile. - 50g coconut oil
Coconut oil helps to thin out the chocolate, ensuring a smooth and glossy finish when coating the bars. It also adds a subtle coconut flavor that complements the filling. - 1 tsp vanilla extract
Vanilla extract adds a depth of flavor and warmth to the bars, enhancing the overall taste and aroma.
Directions & Preparation
Step 1: Prepare the coconut filling
Begin by combining desiccated coconut and condensed milk in a mixing bowl. Mix thoroughly until all the coconut is coated. This step is crucial as it forms the base of your filling, ensuring that the coconut is moist and sweet. If the mixture feels too wet, a little more coconut can be added for better consistency.
Step 2: Shape the coconut filling into bars
Once mixed, take small portions of the coconut mixture and shape them into rectangular bars. This process may take some practice to achieve uniformity. A good tip is to ensure they are tightly compacted to hold their shape during the chocolate coating. Lay them on parchment paper as you work to prevent sticking.
Step 3: Chill the bars
Place the shaped bars in the refrigerator for at least 30 minutes. Chilling helps to firm them up, making it easier to coat them in chocolate. If they are too soft, the chocolate won’t adhere properly, resulting in a messy coating. This step is vital for achieving that perfect bite.
Step 4: Melt the chocolate and coconut oil
In a microwave or using a double boiler, melt the dark chocolate along with coconut oil until smooth. Stirring frequently will prevent overheating and ensure a silky chocolate coating. The addition of coconut oil gives your chocolate a nice shine and smooth consistency, ideal for dipping.
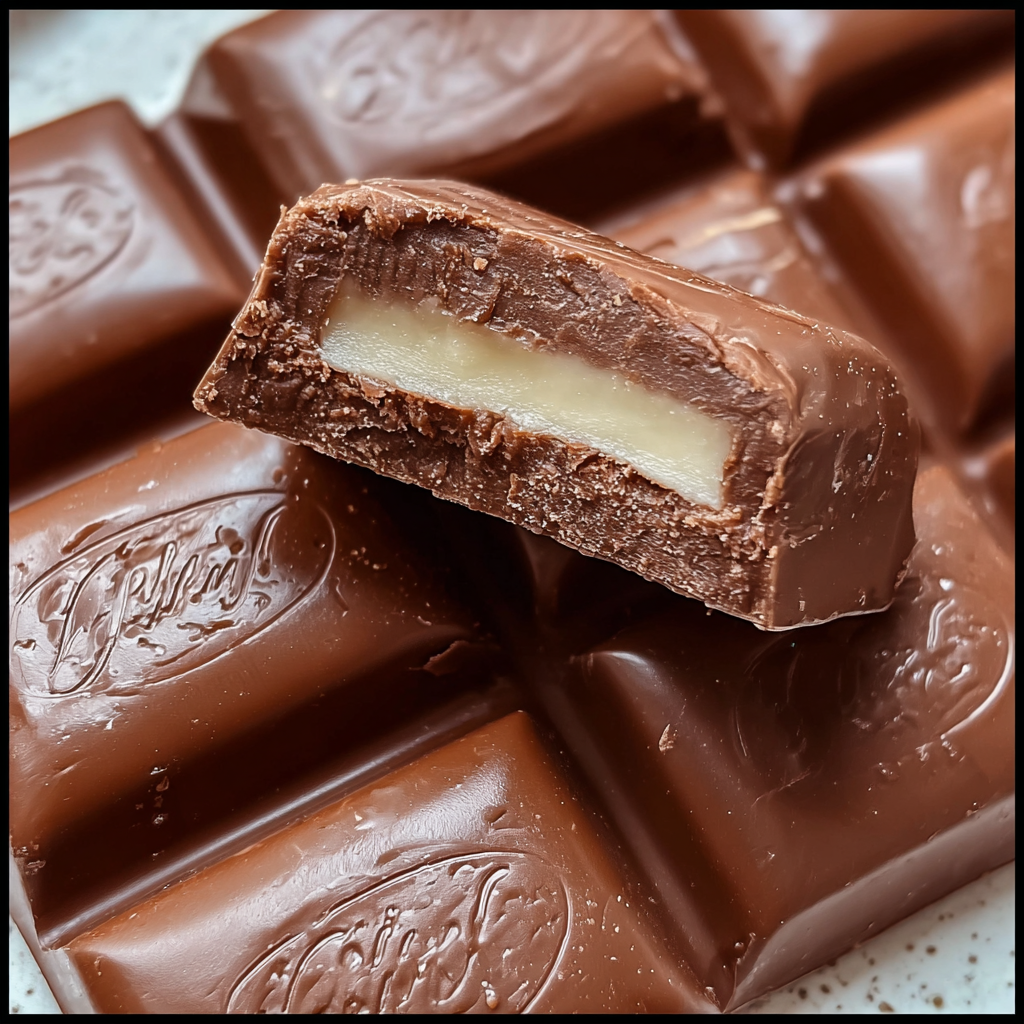
Step 5: Coat the coconut bars in chocolate
Dip each chilled coconut bar into the melted chocolate, ensuring it is completely covered. Allow excess chocolate to drip off before placing them back on parchment paper. This is where the magic happens as you transform the plain coconut filling into a chocolate-covered delight.
Step 6: Chill again to set
Return the coated bars to the refrigerator for at least 30 minutes or until the chocolate hardens. Setting is crucial for achieving that satisfying snap when you bite into the bars. Patience here pays off, as it allows the flavors to meld together beautifully.
Step 7: Serve and enjoy
Once set, the Bounty Chocolate Bars are ready to be served. Enjoy them fresh, or store them for later. Pair them with a cup of tea or coffee for a delightful treat. They also make an excellent gift for chocolate lovers, beautifully wrapped in decorative paper.

The Perfect Coconut Texture
Achieving the right coconut texture is key to making great Bounty bars. The desiccated coconut should be finely shredded to ensure even blending with the condensed milk. This results in a filling that’s chewy but not overly fibrous, which is essential for creating that luscious bite. Consider experimenting with the proportion of coconut to milk, as adjusting this can significantly affect the texture.
Chocolate Choices and Their Impact
Choosing the right type of chocolate can profoundly influence the final taste of your Bounty bars. Dark chocolate creates a rich and slightly bitter contrast to the sweet coconut, elevating the flavor experience. If you prefer something sweeter, opt for milk chocolate, but be aware that it will alter the overall balance. The quality of chocolate should not be overlooked; using a high-quality chocolate can truly enhance your homemade treat.
Personalizing Your Bars
One of the joys of making your own Bounty bars is the ability to personalize them. Consider adding ingredients like nuts, spices, or even flavored extracts to the coconut filling. A pinch of sea salt can also intensify the flavors, creating a delightful contrast with the sweetness. Remember, the possibilities are endless when you create these bars at home, allowing you to cater to your unique taste preferences.
FAQs
What if my coconut mixture is too dry?
If the coconut mixture is too dry and crumbles when shaping, add a little more condensed milk, one tablespoon at a time, until it achieves a moist, moldable consistency.
Can I use sweetened coconut instead of unsweetened?
Yes, sweetened coconut can be used, but it may increase the overall sweetness of the bars. Adjust the amount of condensed milk accordingly.
How can I tell if my chocolate coating is perfect?
The chocolate should be smooth and glossy without any lumps. A good consistency allows it to cling well to the bars without pooling at the bottom.
What if the chocolate coating is too thick?
If the chocolate is too thick for a smooth coating, mix in a bit more coconut oil as you melt it. This will help achieve a pourable consistency.
Can I make mini versions of these bars?
Absolutely! Adjust the size of the bars by using smaller molds or scoops, but keep in mind that the coating time might vary based on size.
Will these bars stay fresh longer if I wrap them?
Yes, wrapping them individually in wax paper or plastic wrap will help maintain freshness and prevent them from sticking together.
Conclusion
Making Bounty Chocolate Bars at home is a rewarding experience that combines creativity with delicious results. Each bite is a reminder of the special treat that can be crafted in your own kitchen. Whether shared with friends or enjoyed solo, they are bound to impress with their rich flavor and texture.
So gather your ingredients, unleash your inner chocolatier, and bring a taste of tropical delight to your home. The satisfaction of crafting your own version of this classic treat is one that every chocolate lover will cherish.
Recipe Card
Decadent and Coconutty: Making Bounty Chocolate Bars
Ingredients
Method
- Prepare the coconut filling
- Shape the coconut filling into bars
- Chill the bars
- Melt the chocolate and coconut oil
- Coat the coconut bars in chocolate
- Chill again to set
- Serve and enjoy
Notes
Additional serving suggestions: pair with a crisp salad, garlic bread, or roasted seasonal vegetables for balance.
For make-ahead, prep components separately and assemble just before heating to preserve texture.
Taste and adjust with acid (lemon/vinegar) and salt right at the end to wake up flavors.