Introduction
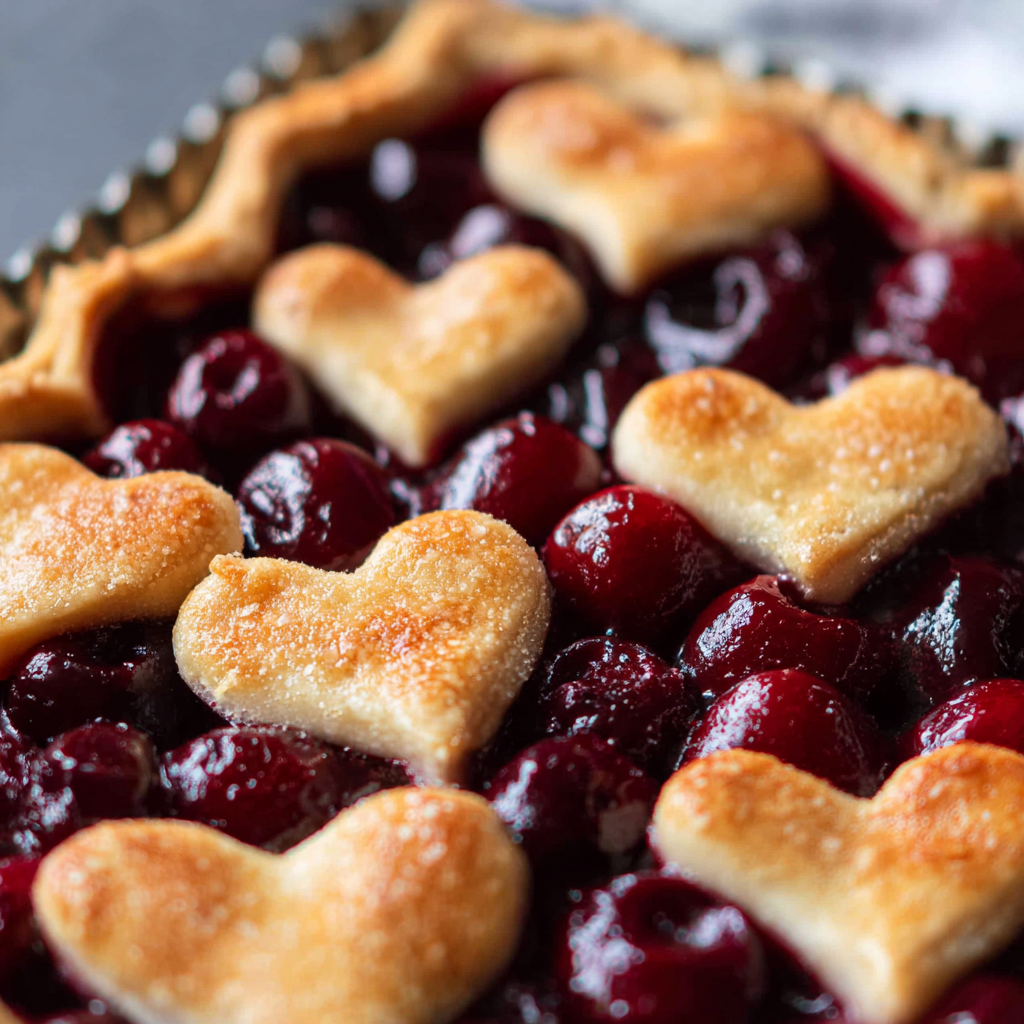
Cherry pie is a classic dessert that captures the essence of summer in every bite. With its sweet-tart filling enveloped in a flaky crust, it evokes nostalgic memories of family gatherings and warm evenings spent outdoors. Making cherry pie from scratch may seem intimidating, but with the right ingredients and a little patience, you can create a pie that outshines store-bought versions.
This recipe encourages you to explore the rich flavors of fresh cherries and allows for creativity in your filling. Whether using sweet or sour cherries, the key is to balance the sweetness with a touch of acidity, ensuring a vibrant and delicious dessert. Together, let's embark on this delightful pie-making adventure, transforming simple ingredients into a comforting treat.
Ingredients
- 2 cups fresh or frozen cherries
Cherries are the star of this pie, providing both flavor and texture. Fresh cherries add a burst of juiciness, while frozen cherries can be a convenient alternative, as long as they are properly thawed and drained. - 1 cup granulated sugar
Sugar sweetens the filling and helps to balance the tartness of the cherries. It's also crucial for drawing out the juices from the fruit, creating a syrupy consistency that coats the cherries. - 1/4 cup cornstarch
Cornstarch acts as a thickening agent, ensuring the filling isn’t too runny. It absorbs excess moisture and stabilizes the filling, yielding a perfect slice without a soupy mess. - 1 tablespoon lemon juice
Lemon juice brightens the flavors and enhances the tartness of the cherries. It also helps to balance the sweetness of the sugar and adds a refreshing zing to the overall taste. - 1 teaspoon vanilla extract
Vanilla extract adds depth and warmth to the cherry filling, creating a aromatic complexity that complements the fruit without overpowering it. - 1 tablespoon butter (for dotting)
Butter adds richness and a slight nuttiness when melted, contributing to the flavor profile and enhancing the overall experience of the pie's filling. - 1 package pie crust (store-bought or homemade)
The pie crust serves as the essential vessel for holding the cherry filling. A good crust should be flaky and buttery, providing the perfect contrast to the soft, juicy filling. - 1 egg (for egg wash)
An egg wash adds a beautiful golden color to the pie crust while baking. It also helps seal the edges and can enhance the texture of the crust. - 1 tablespoon sugar (for sprinkling)
Sprinkling sugar on top of the crust before baking creates a delightful sparkle and adds a bit of sweetness to the pie's exterior, enhancing both its visual appeal and flavor.
Directions & Preparation
Step 1: Prepare the cherries.
Start by washing and pitting the cherries. If you're using frozen cherries, make sure they are completely thawed and drained. This step is crucial as excess moisture can lead to a watery filling. Fresh cherries will yield the best flavor, but don’t shy away from frozen ones if that's what you have on hand.
Step 2: Mix the filling ingredients.
In a large bowl, combine the cherries, sugar, cornstarch, lemon juice, and vanilla extract. Stir gently until the cherries are well-coated. This mixture will create the juicy filling when baked. Pay attention to the consistency; it should look syrupy but not overly soupy. Adjust sugar according to the tartness of your cherries if necessary.
Step 3: Prepare the pie crust.
If using homemade dough, roll it out on a lightly floured surface to about 1/8-inch thickness. Carefully fit one crust into your pie plate, ensuring it’s settled without stretching. For store-bought, follow the package instructions. This foundation is vital for supporting the filling and will help achieve a tender, flaky crust upon baking.
Step 4: Fill the pie crust.
Spoon the cherry mixture into the prepared crust, making sure to distribute it evenly. Dot the filling with small pieces of butter, which will melt and enrich the filling as it cooks. This step is key for creating a flavorful, luscious filling that contrasts beautifully with the flaky crust.
Step 5: Top with the second pie crust.
Place the second crust over the cherry filling, trimming any overhanging edges. Pinch the edges together to seal the pie, and make decorative slits or shapes to allow steam to escape during baking. This step ensures the filling cooks evenly while preventing it from bubbling over.
Step 6: Egg wash and sugar sprinkle.
Whisk the egg in a small bowl and brush it over the top crust. This will create that gorgeous golden-brown finish when baked. After that, sprinkle a bit of sugar on top to enhance sweetness and provide a lovely texture contrast once baked—small details that elevate your pie's appearance and taste.
Step 7: Bake the pie.
Preheat your oven to 425°F (220°C) and bake the pie for about 45-50 minutes or until the crust is golden and you can see the filling bubbling through the slits. Baking at a high temperature initially helps to set the crust quickly, while the filling thickens as the cooking time continues. Keep an eye on it to prevent overbaking.
Step 8: Cool before serving.
Once baked, remove the pie from the oven and let it cool for at least 2 hours before slicing. Allowing it to cool helps the filling firm up, making it easier to serve. Cutting into a warm pie can result in a messy slice, so patience at this stage will reward you with beautifully neat pieces.

Choosing the Right Cherries
The secret to an exceptional cherry pie lies in selecting the right cherries. Sweet cherries like Bing or Rainier are perfect for those who prefer a more sugary treat, while tart varieties such as Montmorency provide a vibrant contrast that can enhance the depth of flavor. Consider your palate and whether you want a balanced tartness or a full-on sweet experience when picking your cherries.
Perfecting the Crust
A flaky, buttery pie crust is essential for a memorable cherry pie. Whether you're making it from scratch or using a store-bought option, be sure to keep your ingredients cold and handle the dough minimally. Consider using a blend of butter and shortening for optimal flakiness. Remember that chilling the dough before rolling can also prevent shrinkage during baking.
Serving Suggestions for Cherry Pie
Cherry pie is delightful on its own, but consider elevating the experience by pairing it with a scoop of vanilla ice cream or a dollop of whipped cream. The creaminess balances the tartness of the cherries perfectly. Additionally, serving it with a drizzle of warm caramel or a sprinkle of nuts can introduce different textures and flavors, turning a simple dessert into a grand finale for any meal.
FAQs
What if my cherry filling is too thick?
If you find that your cherry filling is too thick after mixing, you can add a tablespoon of water or a bit more lemon juice to loosen it up slightly. This can help achieve the desired consistency before pouring it into the pie shell.
What can I do if my pie crust is soggy?
A soggy crust can result from an overly juicy filling or not baking it long enough. To avoid this, always ensure your fruit is well-drained, and consider pre-baking the crust briefly before adding the filling.
Can I scale this recipe for a smaller pie?
Yes, you can easily halve the recipe to make a smaller pie. Adjust the quantities for the filling, and choose a smaller pie dish to ensure even baking. You may need to slightly reduce baking time as well.
How can I tell when my pie is done baking?
Your pie is done when the crust is golden brown and you've noticed bubbling in the filling through the slits on top. The internal temperature should be around 200°F (93°C) for the filling to be perfectly set.
What if my cherry pie tastes bland?
If your pie tastes bland, it may need more sugar or a pinch of salt to enhance flavors. Adding a touch more lemon juice can also bright the flavors and counterbalance sweetness.
Can I use canned cherries for this recipe?
Yes, canned cherries can be used, but be sure to drain them well and adjust the sugar to account for any added sweeteners in the canned variety. This will help you achieve the right flavor balance.
Conclusion
Making cherry pie at home is both a rewarding and delicious experience. As you gather the ingredients and begin the process, you’ll find that the love and care put into baking yield a dessert that’s not only delightful to eat but also a testament to your culinary skills.
Enjoy each slice fresh or warm, and don't hesitate to share this classic dish with family and friends. Every forkful will bring you back to summers filled with memories, making your homemade cherry pie a cherished tradition that lasts for years to come.
Recipe Card
Embrace the Joy of Homemade Cherry Pie
Ingredients
Method
- Prepare the cherries.
- Mix the filling ingredients.
- Prepare the pie crust.
- Fill the pie crust.
- Top with the second pie crust.
- Egg wash and sugar sprinkle.
- Bake the pie.
- Cool before serving.
Notes
Additional serving suggestions: pair with a crisp salad, garlic bread, or roasted seasonal vegetables for balance.
For make-ahead, prep components separately and assemble just before heating to preserve texture.
Taste and adjust with acid (lemon/vinegar) and salt right at the end to wake up flavors.