Introduction
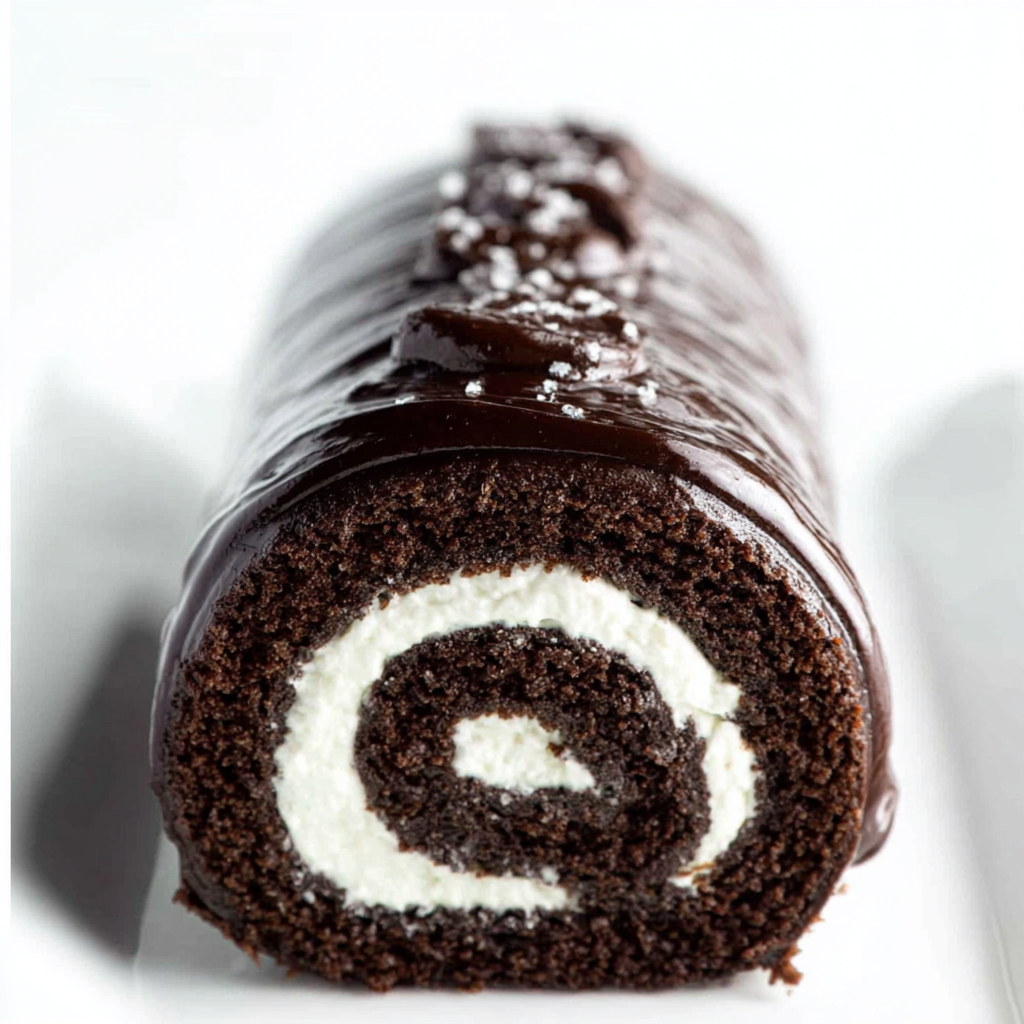
Chocolate cake roll desserts are a delightful combination of rich flavors and satisfying textures. This elegant treat showcases a moist chocolate sponge rolled around creamy filling, making it a stunning centerpiece for any occasion. Perfect for birthdays, holidays, or simply a decadent treat at home, this dessert is as enjoyable to make as it is to eat.
The beauty of a chocolate cake roll lies in its versatility. You can fill it with anything from classic whipped cream to flavored buttercreams or fruit preserves. Not only does this dessert taste divine, but it also allows for creativity in presentation and fillings, making each cake roll uniquely yours.
Ingredients
- 1 cup all-purpose flour
The foundation of the sponge cake, all-purpose flour provides structure and stability. It produces a light texture when combined with the other ingredients, allowing the cake to hold its shape while being rolled. - 1/2 cup unsweetened cocoa powder
Cocoa powder is essential for imparting the rich chocolate flavor to the sponge. It also contributes to the cake's dark color, making it even more inviting. - 1 teaspoon baking powder
Baking powder acts as a leavening agent, ensuring that the cake rises properly. This helps create a light and fluffy sponge that can be easily rolled without breaking. - 1/4 teaspoon salt
Salt enhances the sweetness of the chocolate and balances the flavors in the cake. It also helps to strengthen the overall structure of the sponge. - 4 large eggs
Eggs provide moisture, richness, and act as a binder to hold the cake together. They also contribute to the cake's ability to stretch when rolled. - 1 cup granulated sugar
Sugar not only sweetens the cake but also aids in creating the proper texture. It helps retain moisture, keeping the cake soft and tender. - 1 teaspoon vanilla extract
Vanilla extract adds aromatic depth to the chocolate flavor, enhancing the overall taste of the cake. - 1 cup heavy cream
Heavy cream is used for the filling and provides a luxurious, rich texture. When whipped, it becomes light and fluffy, complementing the chocolate sponge beautifully. - 2 tablespoons powdered sugar
Powdered sugar sweetens the whipped cream filling without weighing it down. It dissolves quickly, ensuring a smooth texture. - Optional: chocolate ganache or icing
This adds an extra layer of richness and visual appeal. Applying ganache or icing enhances the flavor and gives the cake a polished finish.
Directions & Preparation
Step 1: Preheat your oven to 350°F (175°C) and prepare a baking sheet.
Preheating the oven is essential to ensure that the cake bakes evenly from the start. Lining the baking sheet with parchment paper not only prevents sticking but also allows for an easy transfer of the cake once baked.
Step 2: In a mixing bowl, sift together the flour, cocoa powder, baking powder, and salt.
Sifting these dry ingredients helps eliminate clumps and promotes even distribution. This step ensures that all ingredients are well combined, contributing to a consistent texture and flavor throughout the cake.
Step 3: In another bowl, beat the eggs and granulated sugar until pale and fluffy.
This step incorporates air into the mixture, which is crucial for achieving a light and airy sponge. The color change indicates that enough air has been mixed in, making it ready for the dry ingredients.
Step 4: Gently fold the dry ingredients into the egg mixture until just combined.
Folding helps maintain the aeration from the egg mixture, crucial for creating a light sponge. Be careful not to overmix, as this can deflate the batter and lead to a denser cake.
Step 5: Pour the batter onto the prepared baking sheet, spreading it evenly.
Even distribution is key to ensure uniform baking. If the batter is not spread evenly, some parts may be overcooked while others remain undercooked, leading to an uneven texture.
Step 6: Bake for 12-15 minutes, or until the cake springs back when touched.
Proper baking time is essential for achieving the right texture. Underbaking may result in a cake that doesn’t hold its shape, while overbaking can lead to dryness, preventing a successful roll.
Step 7: Once baked, immediately loosen the edges and invert the cake onto a clean kitchen towel dusted with powdered sugar.
Inverting the cake onto a dusted towel helps prevent sticking and ensures a smooth transfer. The towel also absorbs excess moisture, keeping the cake from becoming soggy.
Step 8: Starting at one end, roll the cake tightly in the towel while it’s still warm.
Rolling the hot cake helps to set its shape so it retains that rolled form once cooled. Allowing it to cool in the towel helps prevent cracking when unrolling later.
Step 9: Let the rolled cake cool completely at room temperature.
Cooling is crucial for the cake to retain its shape. If the cake isn't cooled adequately, it may crack when you attempt to fill and unroll it.
Step 10: In the meantime, whip the heavy cream with powdered sugar until double in volume and soft peaks form.
Whipping the cream until soft peaks form creates a light filling that complements the rich chocolate cake. Overwhipping can lead to a grainy texture, so be attentive during this step.
Step 11: Carefully unroll the cooled cake and spread the whipped cream evenly over the surface.
This step is vital to ensure each bite has a delightful balance of cake and filling. Spreading the cream evenly prevents any part of the cake from being too dry or too rich.
Step 12: Roll the cake back up, without the towel, and refrigerate for at least 30 minutes to set.
Chilling the filled cake roll helps it maintain its shape and allows the flavors to meld together. This step is essential for easier slicing and presentation.
Step 13: Optional: cover with chocolate ganache or icing for a finishing touch.
Adding ganache or icing enhances both the flavor and appearance of the dessert. It provides a glossy finish and elevates your cake roll from homemade to gourmet.
Step 14: Slice into pieces and serve chilled for the best flavor and texture.
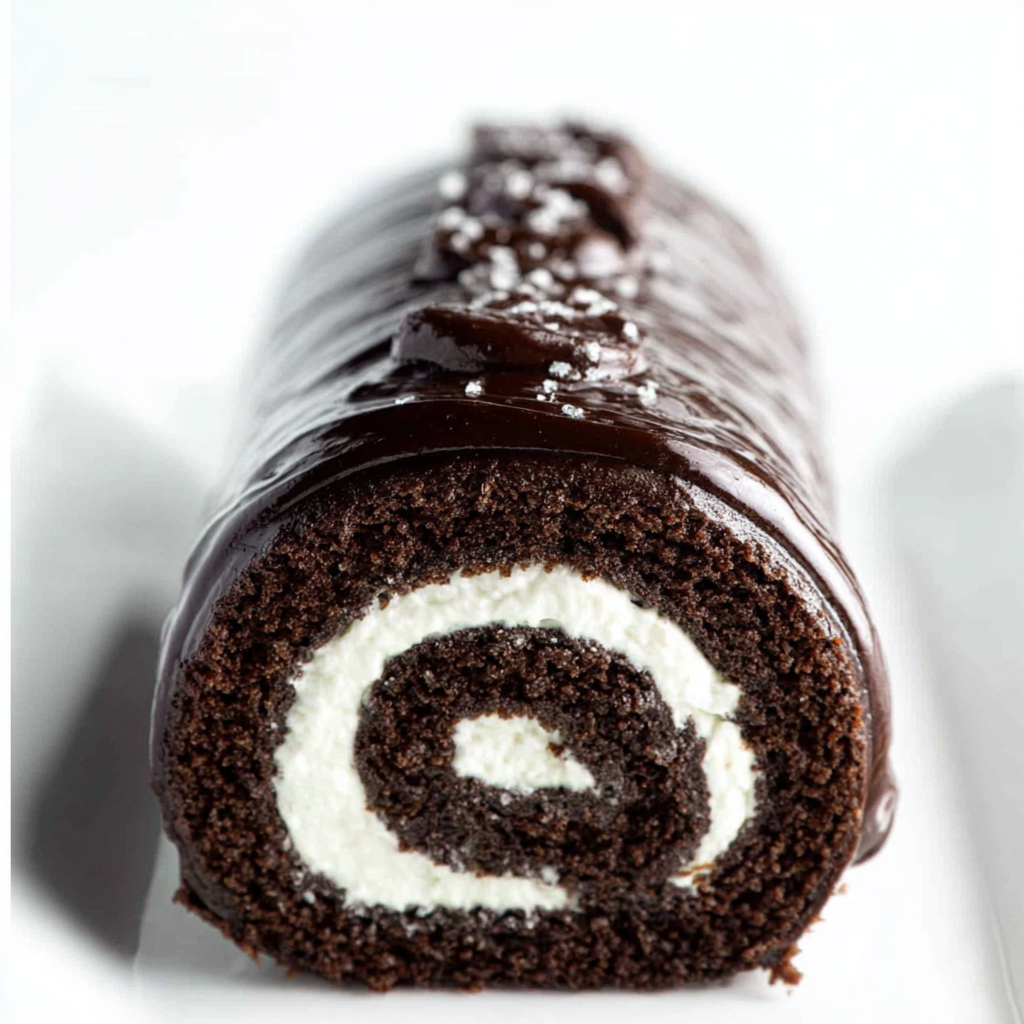
Serving the cake chill allows the filling to hold its shape, making for cleaner slices. This presentation also helps in showcasing the beautiful swirl of chocolate cake and whipped cream.

The Art of Rolling Cake
Mastering the rolling technique is crucial when making a chocolate cake roll. Gently rolling the cake while it is still warm sets its shape and ensures a tight, beautiful spiral. Using a clean kitchen towel helps absorb moisture and prevents sticking, while the dusting of powdered sugar adds a touch of sweetness and keeps the cake from adhering.
Creative Fillings Beyond Whipped Cream
Assembling your cake roll opens a world of possibilities with fillings. While classic whipped cream is a favorite, experiment with various options like mascarpone cheese infused with citrus zest or a rich chocolate mousse. Adding fruits like strawberries or raspberries can also complement the chocolate, offering a refreshing burst of flavor.
Perfecting Your Presentation
Presentation can elevate your dessert from simple to stunning. A dusting of powdered sugar adds elegance, while drizzling ganache over the top creates an appealing contrast. Slicing the cake roll reveals a beautiful spiral pattern, so consider serving on a decorative plate with fresh fruit or chocolate shavings for added flair.
FAQs
What should I do if my cake is too thick or thin?
If your batter appears too thick, consider gently folding in a tablespoon of warm water or milk to adjust the consistency. If it's too thin, ensure you’ve measured your flour and cocoa correctly, and consider adding a touch more flour.
How can I make the cake roll more chocolatey?
You can increase the cocoa powder to 3/4 cup for a darker chocolate flavor. Alternatively, incorporate chocolate chips into the batter or add a layer of chocolate ganache for extra taste.
What can I do if my cake cracks while rolling?
Cracking can occur if the cake is not rolled gently or if it isn't cooled completely before unrolling. If it does crack, try using whipped cream to cover the area, turning it into a design feature.
Can I use different fillings in my cake roll?
Absolutely! Fillings can range from flavored whipped cream, jelly, or even custard. Just ensure the filling is not too wet to avoid making the sponge soggy.
What if the cake roll is too sweet or rich for my taste?
If the cake is excessively sweet, a tangy filling or a less sweet topping can help balance the flavors. Consider using unsweetened whipped cream or adding a hint of lemon juice to the filling.
Can I use egg substitutes in this recipe?
Yes, you can substitute eggs with flaxseed meal or applesauce, using about 1/4 cup per egg. However, the texture may differ slightly, resulting in a denser cake.
Conclusion
Creating a chocolate cake roll dessert at home may seem challenging, but with practice, it's an incredibly rewarding endeavor. Each bite offers a delightful combination of rich chocolate flavor and creamy filling that’s hard to resist.
Enjoy the fun of personalizing your cake roll with various fillings and toppings. As you gain confidence in the technique, you’ll be sure to impress friends and family with your stunning creations.
Recipe Card
Indulge in a Decadent Chocolate Cake Roll Dessert
Ingredients
Method
- Preheat your oven to 350°F (175°C) and prepare a baking sheet.
- In a mixing bowl, sift together the flour, cocoa powder, baking powder, and salt.
- In another bowl, beat the eggs and granulated sugar until pale and fluffy.
- Gently fold the dry ingredients into the egg mixture until just combined.
- Pour the batter onto the prepared baking sheet, spreading it evenly.
- Bake for 12-15 minutes, or until the cake springs back when touched.
- Once baked, immediately loosen the edges and invert the cake onto a clean kitchen towel dusted with powdered sugar.
- Starting at one end, roll the cake tightly in the towel while it’s still warm.
- Let the rolled cake cool completely at room temperature.
- In the meantime, whip the heavy cream with powdered sugar until double in volume and soft peaks form.
- Carefully unroll the cooled cake and spread the whipped cream evenly over the surface.
- Roll the cake back up, without the towel, and refrigerate for at least 30 minutes to set.
- Optional: cover with chocolate ganache or icing for a finishing touch.
- Slice into pieces and serve chilled for the best flavor and texture.
Notes
Additional serving suggestions: pair with a crisp salad, garlic bread, or roasted seasonal vegetables for balance.
For make-ahead, prep components separately and assemble just before heating to preserve texture.
Taste and adjust with acid (lemon/vinegar) and salt right at the end to wake up flavors.